App Drive guide
App Drive is the platform for publishing, sharing and monitoring business web applications, including those built with AI tools such as Lovable, Bolt, v0, Claude and Cursor. It also enables agencies to deliver their clients' applications under their own brand. This guide describes features, usage and roles: from setting up the organization to invitations, from publishing to sharing, through to monitoring and reports.
Contents
- Overview
- Audience
- Glossary
- Getting started
- Organizations
- Invitations
- Teams and permissions
- Publishing platforms
- Using platforms
- Company brand
- Cloud data
- Platform databases
- Overview of the platforms (Hub)
- Partner agencies and clients
- Errors and usage with AI
- Reports and integrations
- Plans and subscription
- Account
- Security and privacy
- FAQ
The screenshots show the Italian interface; the app is also available in English (Account › App language).
Overview
Agencies and software houses build custom web applications for their clients: CRMs, order management, dashboards. Traditionally they deliver them as plain links, with different addresses, credentials and servers: the client ends up managing fragmented tools rather than a coherent service.
With App Drive each client has a single application, under the agency's brand, that brings together all of its platforms:
- available on iPhone, Android and the browser, with one account;
- platforms open inside the app, restricted ones included;
- users have a Report button to send bugs and change requests, with page, screen and browser already filled in;
- applications built with AI (Lovable, Bolt, v0, Cursor) are published quickly from GitHub, a .zip archive, a web address, Vercel or Netlify;
- every push to GitHub automatically builds and publishes the new version;
- sharing works per team or per user, by e-mail;
- access and permissions are defined by the organization: who can view and who can publish each platform.
- the platforms talk to each other: the key data of all of them in a single Overview and, with flows, new data passed from one application to another, with no code.
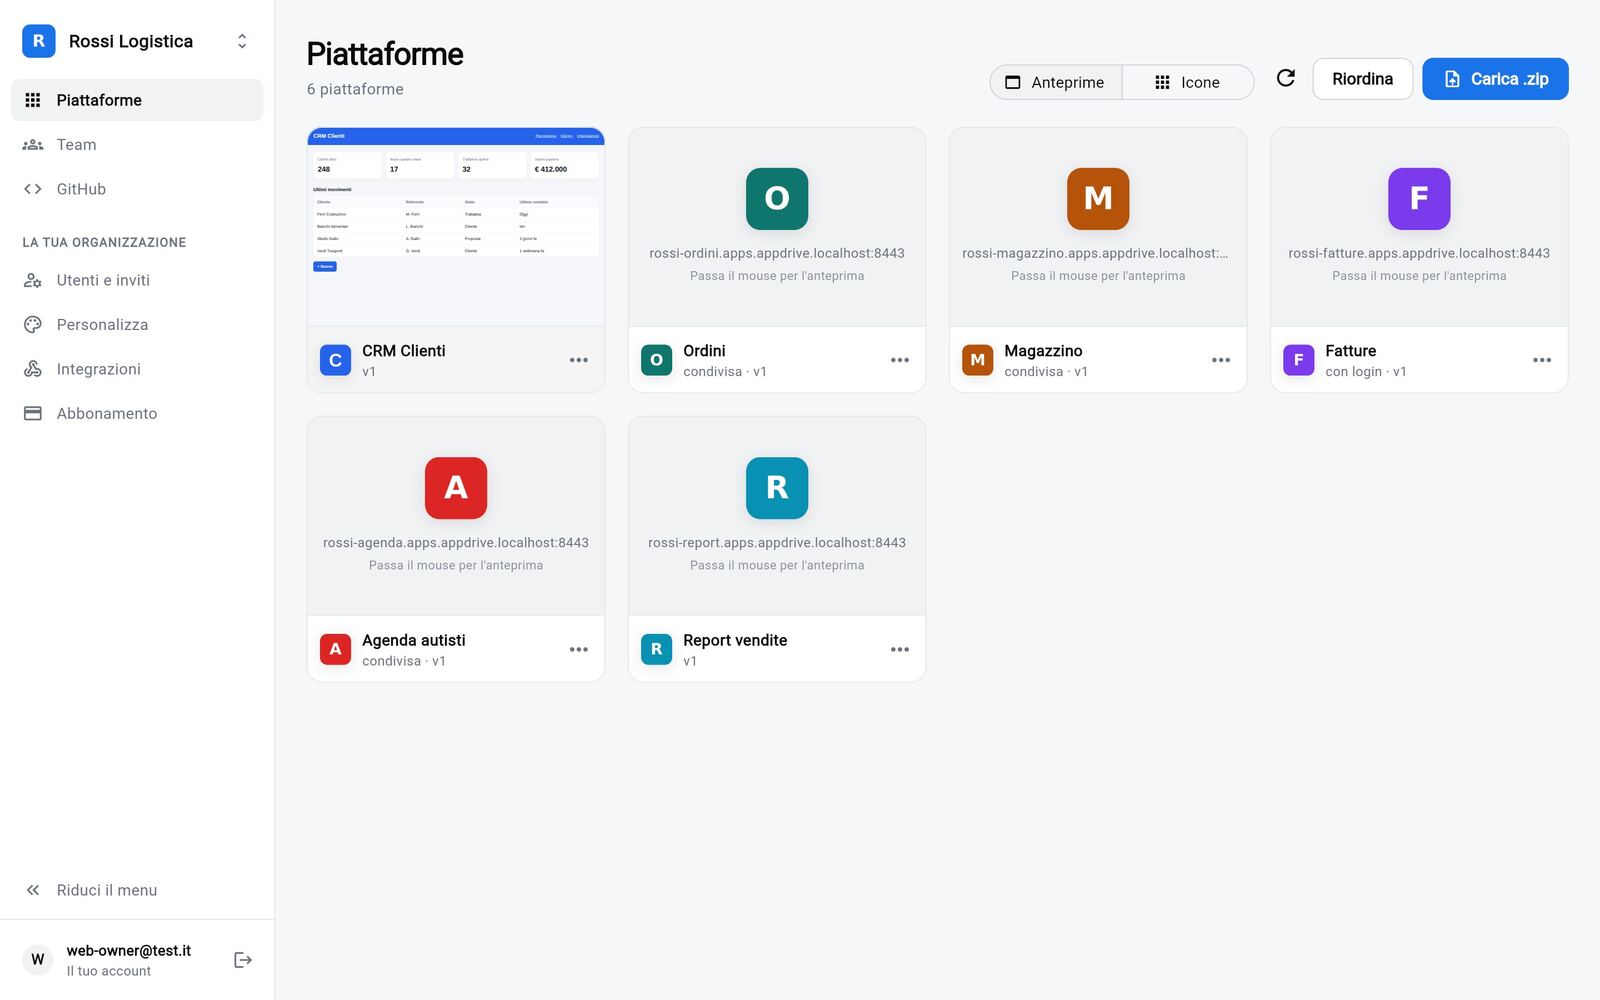
Audience
| Audience | How App Drive is used |
|---|---|
| Digital agencies | One organization per client: the client reaches all of its applications from a single place, under the agency's brand or its own. |
| Software houses | Custom back-office tools and dashboards delivered as a product, with automatic updates from GitHub. |
| In-house IT at SMEs | Internal tools from departments and sites gathered in one application, with permissions defined per team. |
App Drive hosts static sites: Flutter web, React, Vue, Angular, Svelte, Astro, Next.js with static export, or HTML. Any back end (Supabase, Firebase or a dedicated server) stays on the existing infrastructure: App Drive hosts the front end. An application already published elsewhere (Vercel, Netlify, Lovable or your own domain) is added through its address, with no upload.
Glossary
| Term | Definition |
|---|---|
| Platform | A web application published on App Drive, with its own address https://<name>.apps.somio.cloud, icon and name. |
| Organization | The space of a client (or of the agency): users, teams, platforms, brand and subscription. Organizations are isolated from one another. |
| Server owner | The operator of App Drive, who creates organizations and invites their administrators. On drive.somio.cloud this is Somio. |
| Administrator | Manages their organization: users, invitations, brand, integrations and subscription. |
| Member | Uses the platforms they have access to, publishes their own, creates teams and shares. |
| Team | A group of users in the same organization with whom selected platforms are shared. |
Getting started
- Request an invite from the home page. During the beta, access is granted to a limited number of companies at a time: we will contact you as soon as a place is available.
- Once you receive the invite code, open App Drive in the browser at drive.somio.cloud/app or in the smartphone app.
- Select Received an invitation? Sign up and enter the code, your e-mail and a password of at least 12 characters. The account is created with the organization administrator role.
- Customize name, color and logo (Company brand).
- Publish the first platform (Publishing platforms) and invite your colleagues (Invitations).
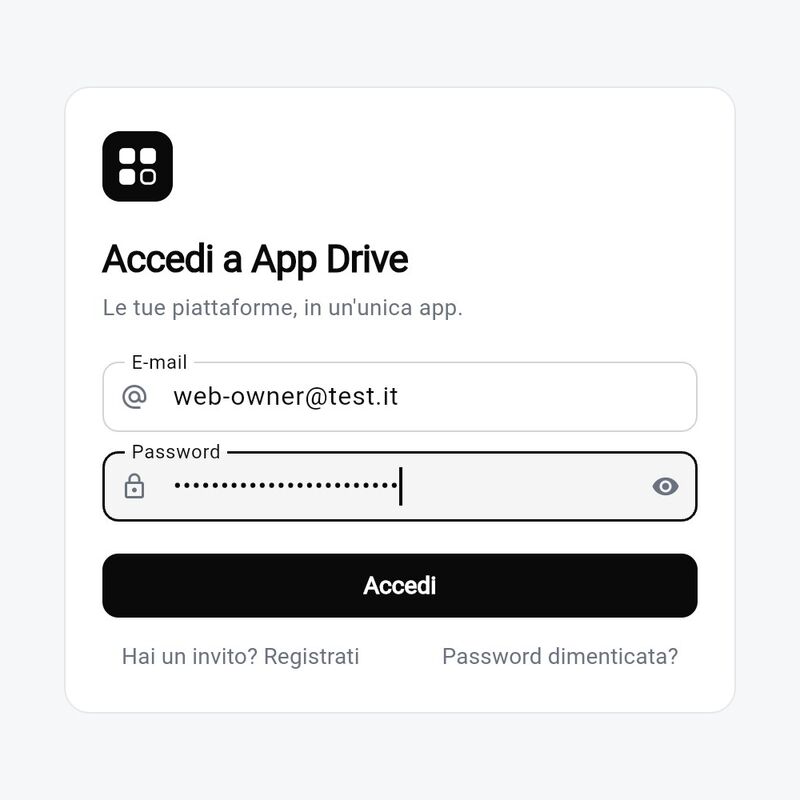
If you forget your password, select Forgot password? on the sign-in page: you will receive a code by e-mail to set a new one.
Navigation. In the desktop browser the menu is on the left, in three groups: the common items (Platforms, Teams, Connections), Your organization (administrators only) and Server (server owner only). The account is at the bottom. On smartphones the same items are in the ⋯ menu at the top right.
Organizations
An organization is a client's space: users, teams, platforms, brand and subscription. Organizations are isolated: a client's users, teams and platforms are neither visible nor reachable by others.
Creating an organization
Organizations are created by the server owner, from Client organizations › New: after entering the client's name, they open its page and select Invite with Organization administrator enabled. The invitee receives the code, signs up and becomes the administrator, able to invite their own colleagues.
On drive.somio.cloud the first organization is created by Somio when you join the beta. To activate more, one per client, write to tickets@somio.it: they are included in the subscription.
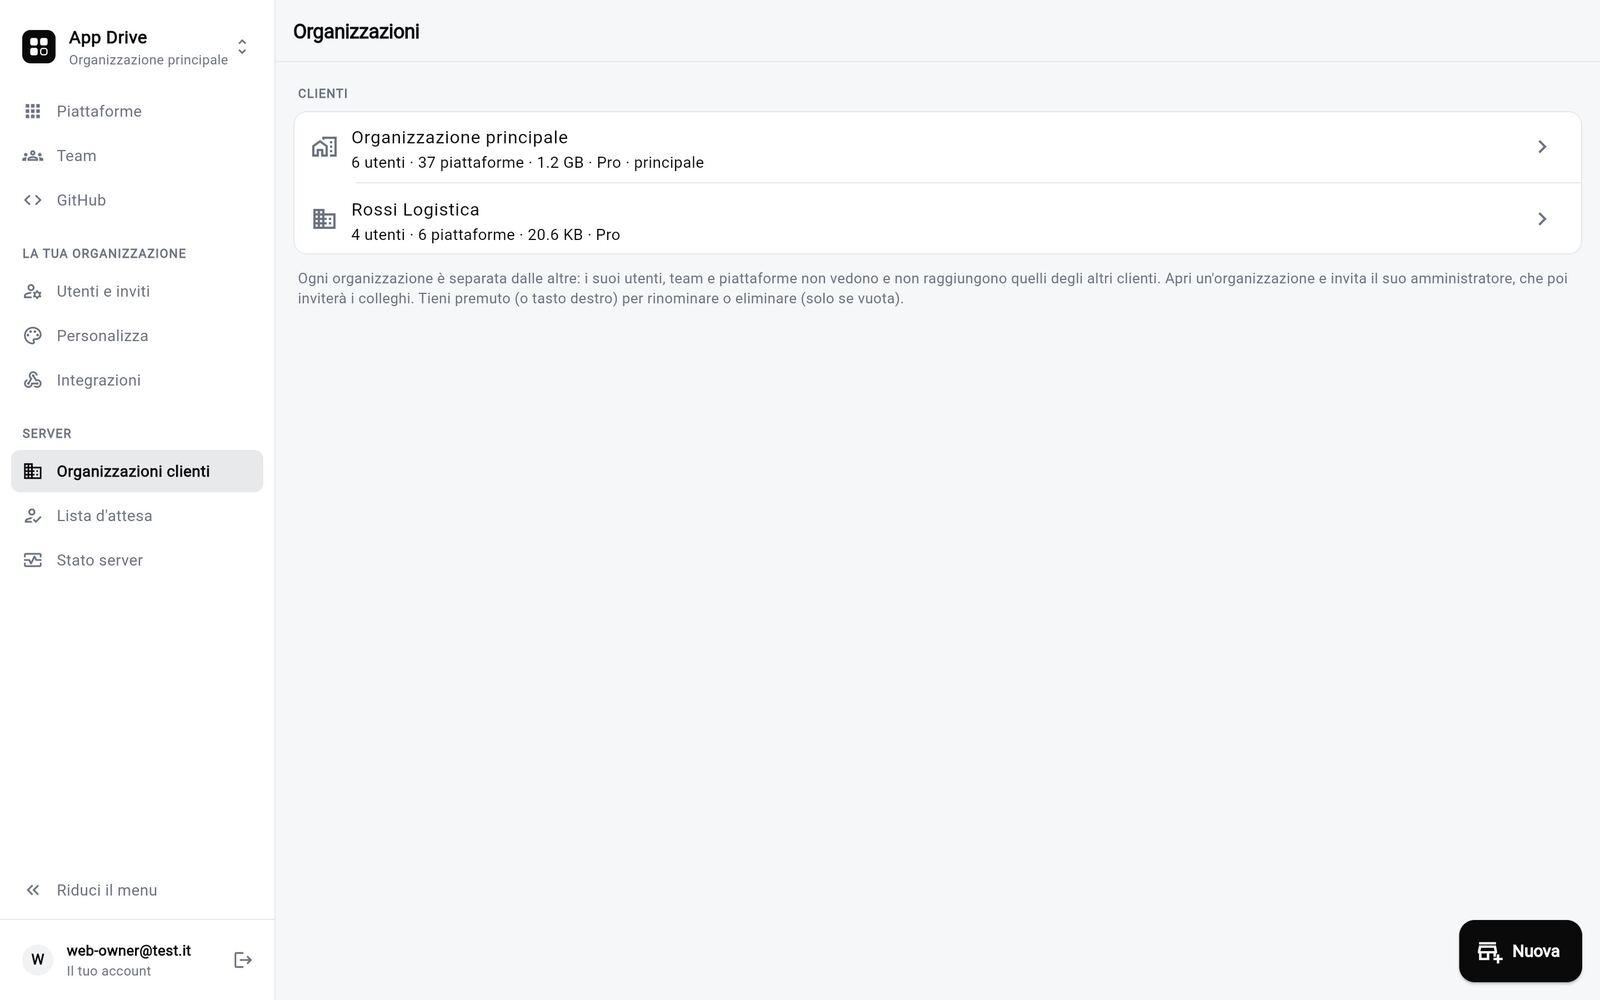
Several organizations, one account
The same user can belong to several organizations with the same e-mail and password: agency staff access every client's space, and a client can admit an external consultant.
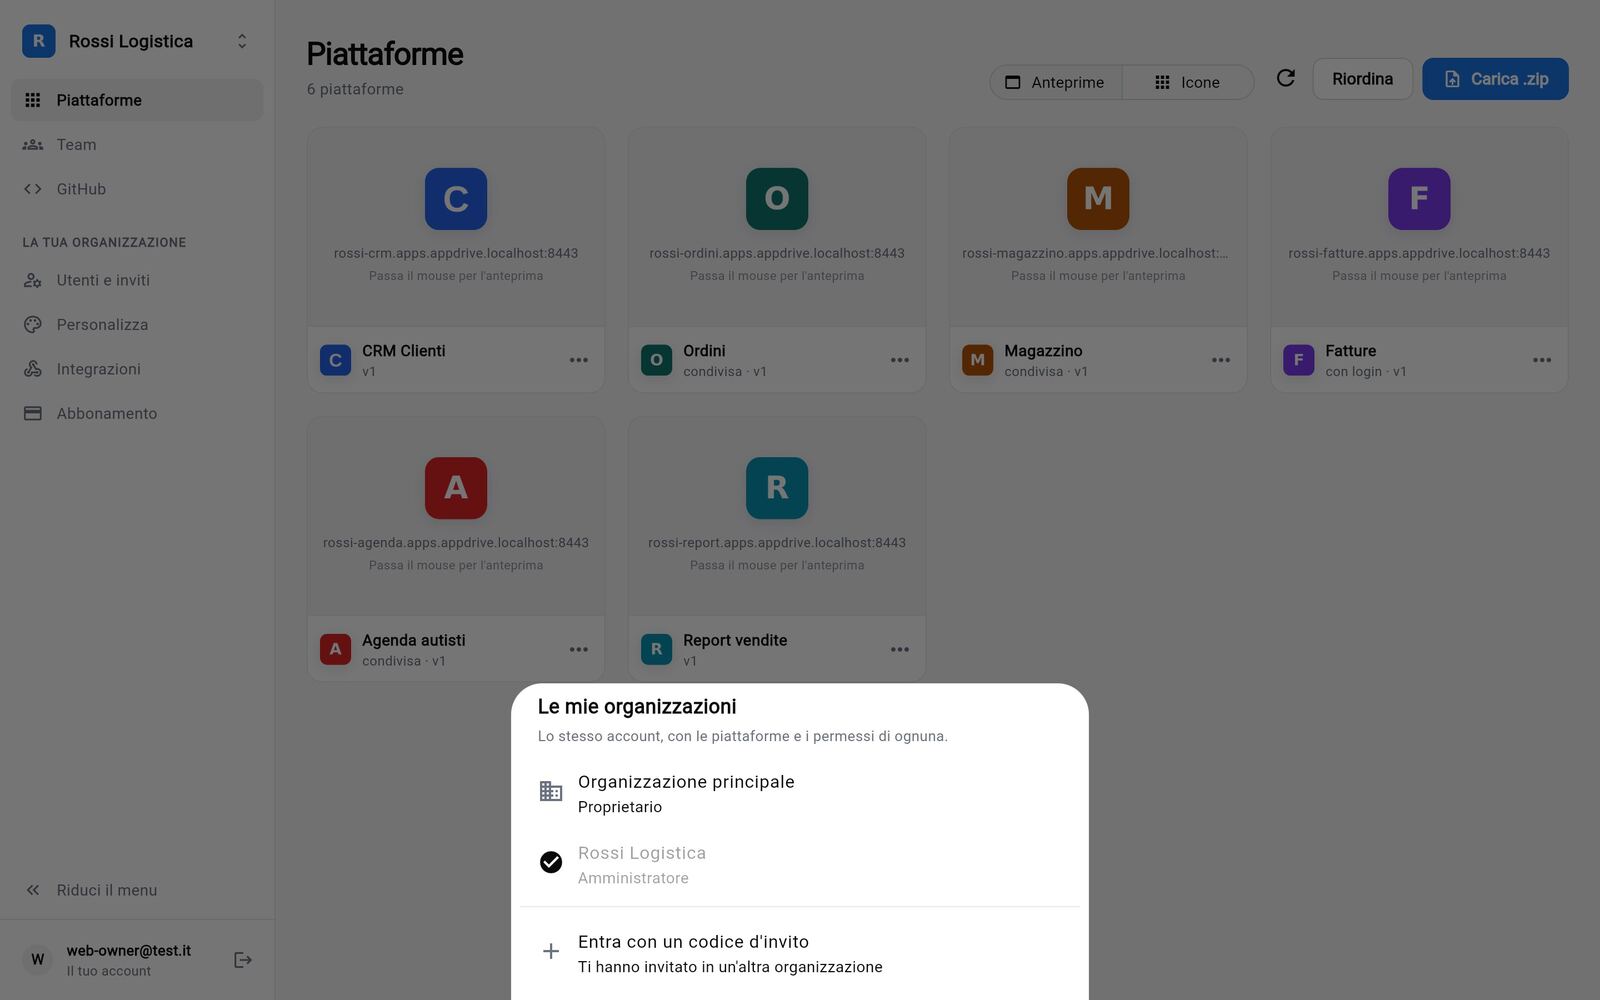
- Switching organization: in the browser, select the name at the top of the side menu; on smartphones, menu ⋯ › Switch organization. My organizations opens, where you choose the one you need.
- Joining another organization with a code you received: from My organizations select Join with an invitation code. Alternatively, sign up with the code using the e-mail and password you already use.
- Leaving an organization: Account › Leave followed by the organization's name. Your platforms in that organization are deleted; your membership of the others is unaffected.
Invitations
Access to App Drive is by invitation only: there is no open sign-up. An invitation is a code generated in the app and sent to the person concerned, together with ready-made instructions.
Inviting into your organization (administrators)
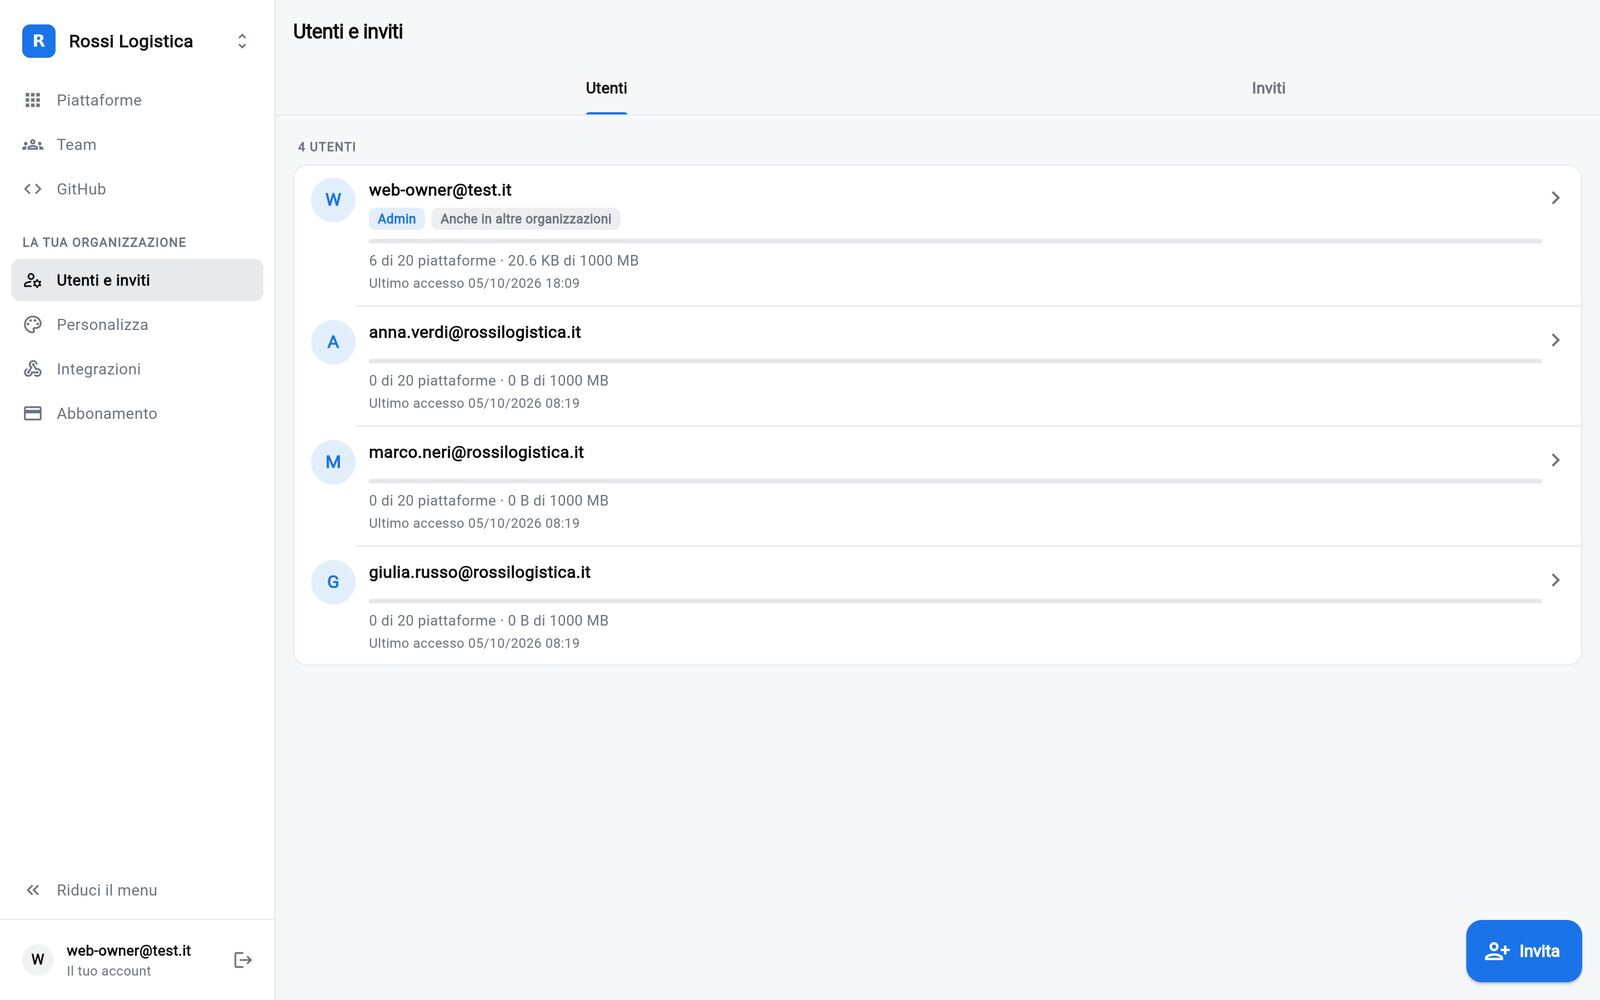
- Open Users and invites and select Invite.
- Optional: specify the recipient. If you enter an e-mail, only that address can use the code.
- Set the code's validity in days and select Create invite.
- Share the code. It is shown only once: copy or forward it immediately.
The recipient opens App Drive, selects Received an invitation? Sign up and enters the code. If they already have an App Drive account in another organization, they use the same e-mail and their password, or Join with an invitation code from My organizations.
The Invites tab lists pending, used, expired and revoked invitations and lets you revoke a code not yet used.
Permission to invite
By default only organization administrators can invite new users. In Users and invites › Invites › Who can invite you can enable Team admins too: team administrators will be able to invite new users directly into their team (see Teams and permissions). Users invited this way still join the organization as members.
Managing users
In Users and invites, selecting a user allows you to:
- suspend them: they lose access and the ability to publish, and their platforms go offline; no data is deleted and they can be reactivated at any time;
- change their limits on storage and number of platforms;
- generate a password reset code, should they not receive the e-mail;
- delete them, together with their platforms.
If the user has the same account in other organizations, Also in other organizations is shown: suspension and deletion apply only in your organization, and the password is reset with Forgot password?.
Teams and permissions
Each user sees their own platforms and those shared with the teams they belong to. A team is a group of users in the same organization, for example "Warehouse" or "Accounting".
Creating a team and adding members
- Open Teams (on smartphones: menu ⋯ › Teams and sharing) and select New team. Its creator becomes its administrator.
- Select Add member: the list of organization users not yet in the team is shown. Search by e-mail, select one or more and confirm with Add.
- For people without an account, choose Add by e-mail: if the organization allows it (Team admins too), App Drive generates a code that registers the person and adds them directly to the team. Otherwise, an organization administrator must invite them first.
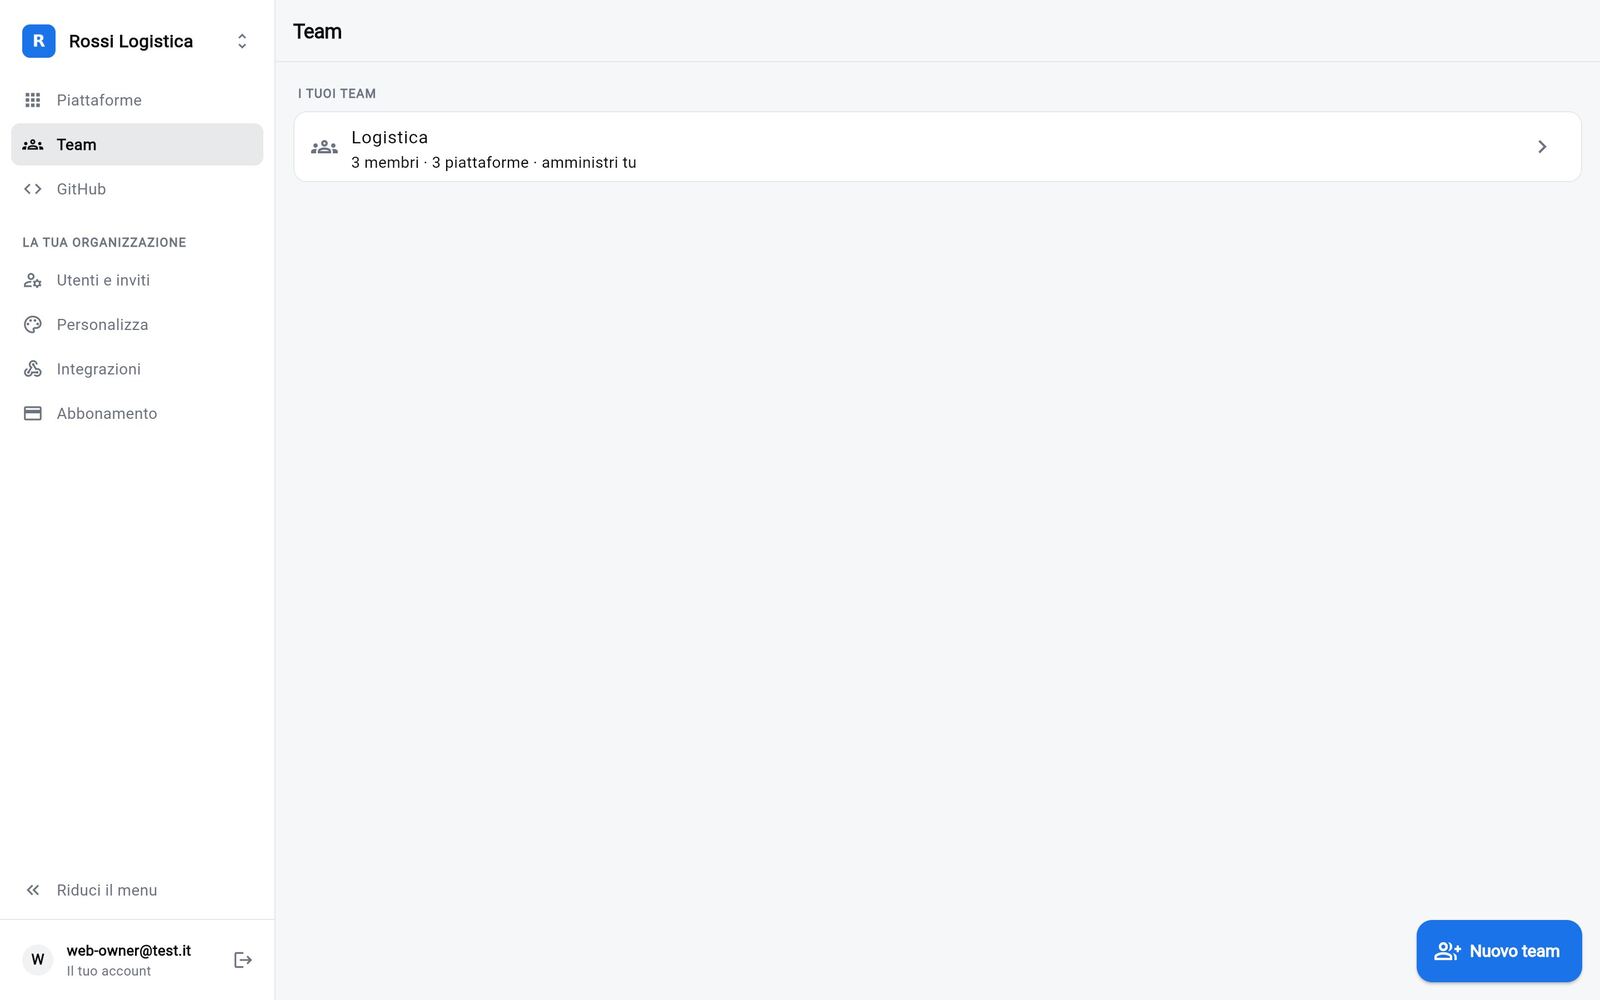
Team administrators can appoint other administrators, define what members can do (add users, share their own platforms with the team), remove users or delete the team.
Sharing a platform
Open the menu of one of your platforms (⋯ button, right click or long press) › Sharing and access:
- People: enter the recipient's e-mail and select Share. If they already belong to the organization, the platform appears in their home at once (and they receive an e-mail, if the server is configured to send one). If they have no account yet, App Drive generates an invitation: the code is shown for forwarding and, once they sign up, the platform appears in their home. For each user choose Can view or Can edit; invitations not yet used can be withdrawn.
- Teams: select the teams to grant access (or create one with New team). For each team choose Can view (open only) or Can edit (also upload new versions and run builds from GitHub). Name, icon, sharing and deletion remain with the owner.
- Link: the address to share. With Login required on, only authorized users (the owner and the selected people and teams) get in from the browser, after authenticating; with it off, anyone with the link can open it. A padlock appears next to the name. Anyone attempting to access without authorization sees the account used and how to request access.
Members find shared platforms in their home, marked with the people icon next to the name: they can open them (even when login is required), make them available offline and reorder them, but not delete them. Non-owners can only archive them, i.e. remove them from their own home (see The home).
Publishing platforms
Everything starts from Add platform: the button at the top of the home on desktop, or menu ⋯ › Add app on smartphones. The available sources are:
| Source | When to use it |
|---|---|
| From an address | The application is already published: Lovable, Bolt, Replit, v0, Cloudflare or your own domain. |
| From Vercel or Netlify | The application is a Vercel or Netlify project: select it from the list and monitor its deploys. |
| From GitHub | The code is on GitHub (including Lovable, Bolt and v0 projects, which sync there): App Drive builds and hosts the application on every push. |
| Upload a .zip file | The build folder is available locally. |
With GitHub and .zip the application is hosted by App Drive at
https://<name>.apps.somio.cloud; with an address, Vercel or Netlify it stays on
its original hosting and App Drive integrates it. In the browser,
Publishing in the side menu gathers the same sources and the connected
accounts (GitHub, Vercel, Netlify).
Build check. Before a new version goes live App Drive checks that
index.html finds every file it loads. If one is missing the page would stay
blank: the version is not published, the previous one stays online and the
message says what to fix. The typical case is Vite's base set for another
host (/repo-name/): set base: "/" in vite.config. If the code calls
http://localhost, the version is published but App Drive points it out:
those addresses only work on the computer the app was made on.
Trial version. From the platform menu, Trial version publishes a
version to try (or to have the client try) before it goes live, at its own
address: https://<name>--prova.apps.somio.cloud. It always asks for the
login, even when the app is public, and only those who can see the app see
it. Upload it as a zip or, for apps linked to GitHub, choose a trial
branch (e.g. dev): pushes to that branch update the trial, those to the
main branch keep publishing the live version, and a failed trial build does
not mark the app as broken. Promote makes it the live version (with the
same checks as a publish); the previous version stays, to go back.
From GitHub (recommended)
Every push to the selected branch triggers an automatic build and release, within 2–5 minutes.
- Select Add app › From GitHub (in the browser also Publishing › GitHub) and then Connect a GitHub account. Choose the repositories App Drive may access, private ones included, and confirm on GitHub.
- Select New platform from GitHub: specify repository, branch, folder (for monorepos) and the short name of the address, then Connect and publish.
- App Drive adds the workflow
.github/workflows/appdrive-<name>.ymland the publishing token to the repository. The project type (Flutter, React, Vue, Angular, Svelte, Astro, Next.js with static export, HTML) is detected automatically.
Until the first build completes, the icon shows an orange hourglass.
To link a repository to an existing platform, open its icon's menu › GitHub and publishing. The same screen lists the latest builds and lets you start a new build.
Build variables
If the project runs locally with variables, for example
flutter run --dart-define=SUPABASE_URL=<url> --dart-define=SUPABASE_ANON_KEY=<key>
or a .env file with VITE_ variables, the GitHub build must receive them
too:
- Open the platform's menu › GitHub and publishing › Build variables.
- Select Paste from flutter run or .env and paste the command or file you use.
- Confirm with Save and rebuild.
Variables found in the code. In Build variables App Drive lists the
variables the code uses that are not set yet (VITE_…, NEXT_PUBLIC_…,
--dart-define, .env.example), each with Add. If the app is linked to
a Supabase project, its address and anon key are already filled in: Add
the Supabase values adds them all at once.
Variables are stored in App Drive, not in the repository. In a web app, however, they end up in the site's code and can therefore be read by anyone who opens it: URLs and public keys (such as Supabase's anon key, protected by Row Level Security) are appropriate, never secret keys.
From a .zip archive
Compress the web build folder (with index.html at its root) and upload it
from Add app › Upload a .zip file. A single index.html is accepted as
well. For updates: platform menu › Upload a new version.
Every unknown path returns index.html, supporting client-side routing
(React Router, go_router). The icon is taken from the project's
manifest.json and can be replaced with Change icon.
From an address (Lovable, Bolt, Replit, v0)
Add app › From an address: enter the application's address (https://)
and optionally a name. The platform appears in the home with icon, teams,
sharing and "Report"; App Drive detects where it is hosted (for example
Hosted on Lovable). It also gets an App Drive link,
https://<name>.apps.somio.cloud, which leads to the site.
Inside App Drive the application opens within the app; if the site does not allow embedding, the browser opens it in a new tab (the platform's menu explains why).
From Vercel or Netlify
- Add app › From Vercel or Netlify (in the browser also Publishing).
- Connect the account with a personal token: on Vercel from Account › Tokens, on Netlify from User settings › Applications › Personal access tokens. The token is stored encrypted on App Drive and can be disconnected at any time.
- The list of projects appears: select Import. A project already in the home (imported by you, by a colleague or added with the same address) shows Already in the home and cannot be imported twice.
From the platform's menu (Deploys on Vercel or Netlify) you can see the status of the latest deploy and, by configuring a deploy hook, start a new one.
Custom domain
A platform hosted on App Drive can also answer on an address of yours or
your client's, like app.client.com:
- Platform menu › Custom domain, enter the domain and press Continue.
- In your domain panel create the CNAME record shown (name and value are ready to copy).
- Press Verify: once the domain points to App Drive it becomes active, with an automatic HTTPS certificate. The app's address in the home and in shared links becomes the new one; login, data and monitoring work as before.
Host on App Drive: restricted applications
App Drive's login protects the App Drive link of a platform hosted
elsewhere, but not the site's direct address (for example
<project>.vercel.app or <project>.lovable.app), which remains reachable
without authentication by anyone who knows it. App Drive cannot restrict
access to a site it does not host, and says so on the sharing screen.
For complete protection, open the platform's menu › Host on App Drive and choose From GitHub or Upload .zip. With the first version the platform moves to App Drive keeping link, teams and settings; from then on no content is reachable without login. Until then the original site stays live and can be decommissioned afterwards.
Storage and number of platforms
Each organization has a platform and storage limit set by its plan (Plans and subscription). Storage includes every version kept. Current usage is shown in Account.
Using platforms
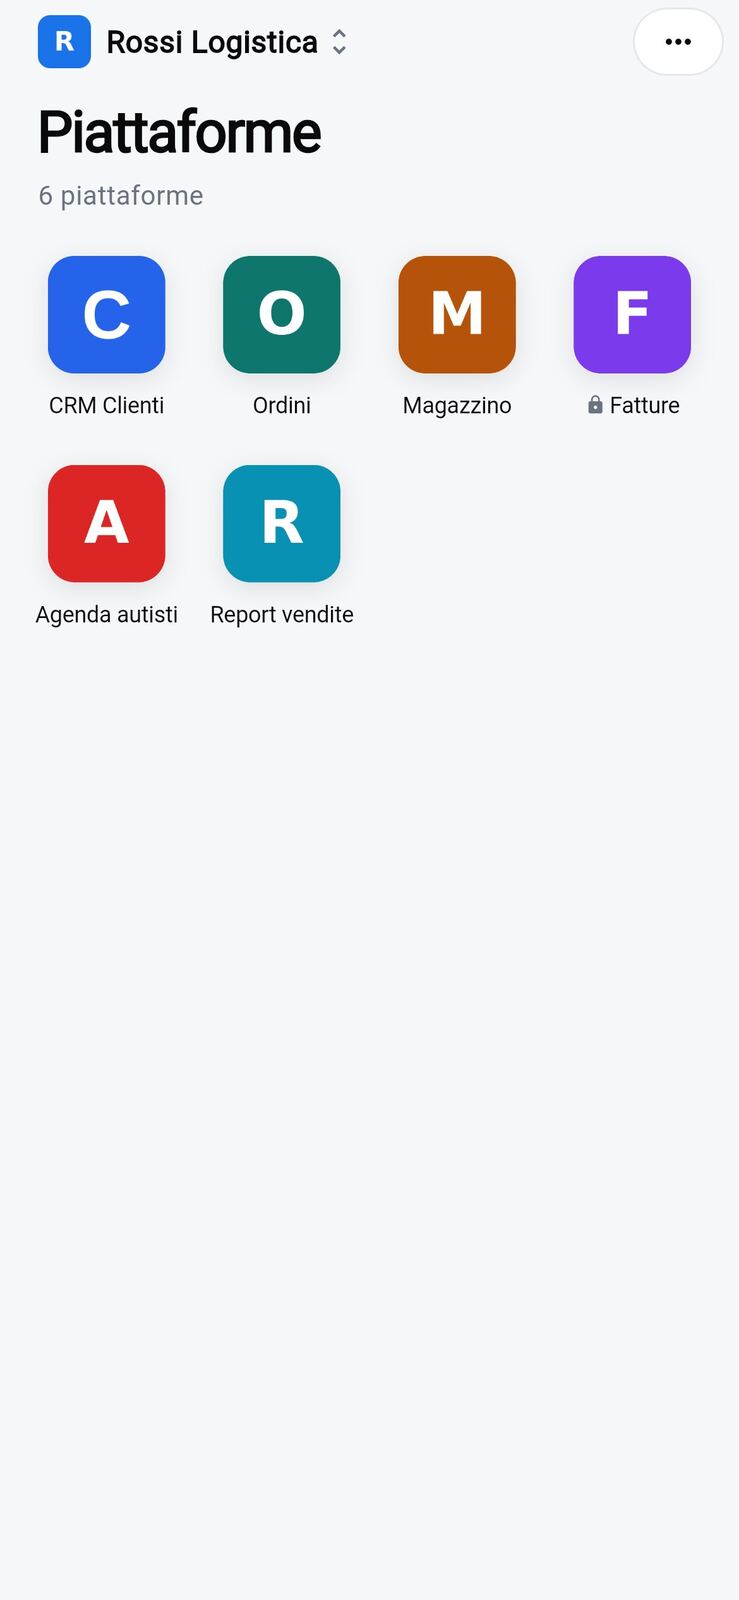
The home
First steps. Until they are done, a box at the top of the home shows the next steps, each with its button: publish the first app, share it with a colleague, protect it with the login and, if it uses Supabase, link its Back-End. It closes with Hide.
Select a platform to open it. In the browser the home shows platforms as cards with a live preview (or as icons); on smartphones as icons, following mobile conventions.
-
Archiving: platform menu › Archive (remove from home), or the – in Edit the home. The platform is removed from your home only: it is not deleted and nothing changes for other users. It is available in Archive (in the browser in the side menu, on smartphones in the ⋯ menu) and can be brought back with Restore. Only the owner can delete a platform from the server.
-
Ordering: menu ⋯ › Edit the home, then drag the icons. The order is saved on the server and is the same on every device.
-
Platform menu: with the ⋯ button (in the browser it appears when hovering over the icon), with a right click or, on smartphones, a long press. It includes sharing, offline copy, new version, GitHub, name and icon.
-
Marks on the icons (for those who may publish the platform):
- a spinning circle at the bottom right means publishing in progress (a build from GitHub or Supabase functions); when it ends the home refreshes by itself;
- a red exclamation mark at the bottom right means the last build from GitHub failed: the previous version stays online. In GitHub and publishing (marked too) the build is listed with Why does it not build?; the mark goes away at the next build;
- a red number at the top right means the Supabase Back-End needs a look (functions not deployed or missing secrets). The same number shows on Supabase Back-End in the platform menu.
In the browser, Platforms in the side menu shows how many platforms need attention (failed build or Supabase). For platforms linked to GitHub before this feature, the failed-build mark starts after the first Rebuild, which updates the workflow in the repository.
Global search
One search to find anything: Search at the top of the side menu, Ctrl+K (⌘K on a Mac) from any page, or the lens at the top on a phone. Type and the results appear, in groups:
- the app's Pages (e.g. Branding, Users and invites);
- Apps, Dashboards and cards, Flows;
- Clients (for agencies), People and teams (people for administrators only);
- In the data of the cards: the entries of the cards you see (a customer, an order, a job), read from their sources at that moment, only in the fields the cards show. They arrive one card at a time, after the rest.
↑ ↓ and Enter choose without the mouse. Tapping a data entry opens the rows of its card, already filtered with what you searched. Everyone finds only what they can already open; nothing you search is kept on the server, and recent searches stay on this device while the app is open.
In the browser: collapsed menu and side-by-side platforms
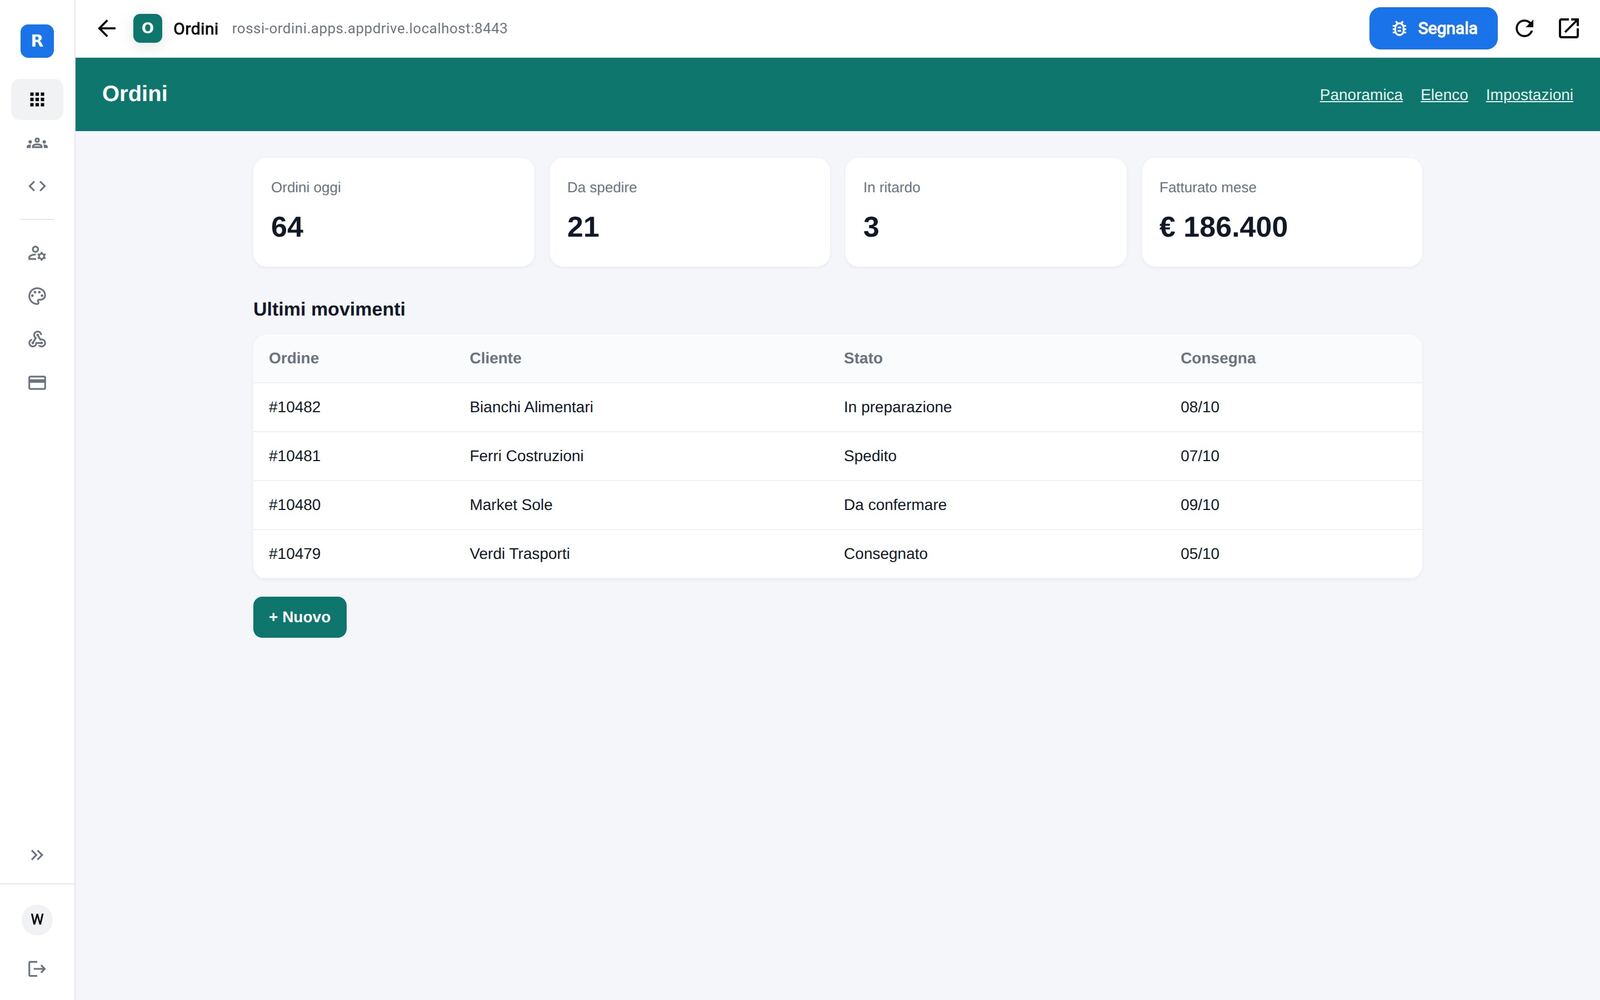
- Collapse the menu (at the bottom of the side menu) shows icons only, leaving more room for the open platform.
- Open a platform alongside: with a platform open, the alongside button opens another next to it. Drag the central divider to adjust the sizes (double-click to return to an even split); App Drive remembers the layout. At most two platforms can be shown side by side: opening a third asks which to replace, and the replaced one stays open in the background, exactly as it was.
Notifications and the icon's badge (web version)
In Account › Notifications on this device you turn on the browser's notifications, which arrive even with App Drive closed. Send a test notification checks that they arrive.
| Notification | Who gets it |
|---|---|
| Failed build, new errors, Supabase function not deployed, Supabase migrations to apply | The platform's owner and whoever may publish it |
| Flow deliveries expired after 24 hours | Whoever made the flow, or else the admins |
| Trial version ready (after a push to the trial branch) | The owner and whoever may publish it |
| New version published | Whoever may open the platform, except who published it |
| New member in the organization | The admins |
| AI analysis done (when it takes more than a few seconds) | Whoever started it |
| Server update failed | The server's owner |
Tapping a notification opens App Drive on the page of the event: the failed build, the app's errors, the Supabase back end, the trial version, the app itself, the users or the server status. The link in alert e-mails goes there too. If the app no longer exists or the page is not one you can open, the home opens.
Each event arrives once. E-mails stay for the owner (builds, errors, Supabase, server): the other events come only as notifications. When App Drive is installed as an app, its icon shows the number of things to look at.
- Computers and Android (Chrome, Edge, Firefox, Safari on Mac): just turn them on.
- iPhone and iPad: first, in Safari, tap Share › Add to Home Screen, then open App Drive from the home screen and turn them on there.
They are turned on per device and off from the same switch.
On smartphones: full screen
Platforms open full screen: the phone's bars disappear and only a thin handle is left at the bottom. Tap it to show the bar with Back, Report and the full screen button for a few seconds; swipe it up to go back home. The content always stays inside the safe area of the screen (notch, rounded corners, system bar), and around the page App Drive uses the platform's own color. The button in the bar turns full screen off or on: the choice is kept on the device.
On smartphones: offline copies
Platform menu › Make available offline: the app downloads a copy, which opens when there is no network or the server does not respond. When a new version is available, the icon shows a blue indicator: Update offline copy (or Update offline copies from the ⋯ menu to update them all).
Long operations in the background
Operations that take time do not block the app: AI analyses and fixes, publishing Supabase functions and Cloud Functions, database migrations, Firestore rules and indexes, data export. A box at the bottom right shows their progress while you keep working or change page; when more than one runs, the boxes stack up. On smartphones it is a small pill that says what is going on (orange when a decision is needed): tap it to open it, Minimize to close it again. When a decision of yours is needed the box becomes an alert with the buttons to choose. At the end it says how it went: if there is a result to look at (a diagnosis, a fix prompt, the exported file) it stays with View or Download until you open or close it; otherwise it goes away by itself after a few seconds. If you stayed on the same page meanwhile, the result opens at once. Do not close the app or the browser while an operation is under way.
Company brand
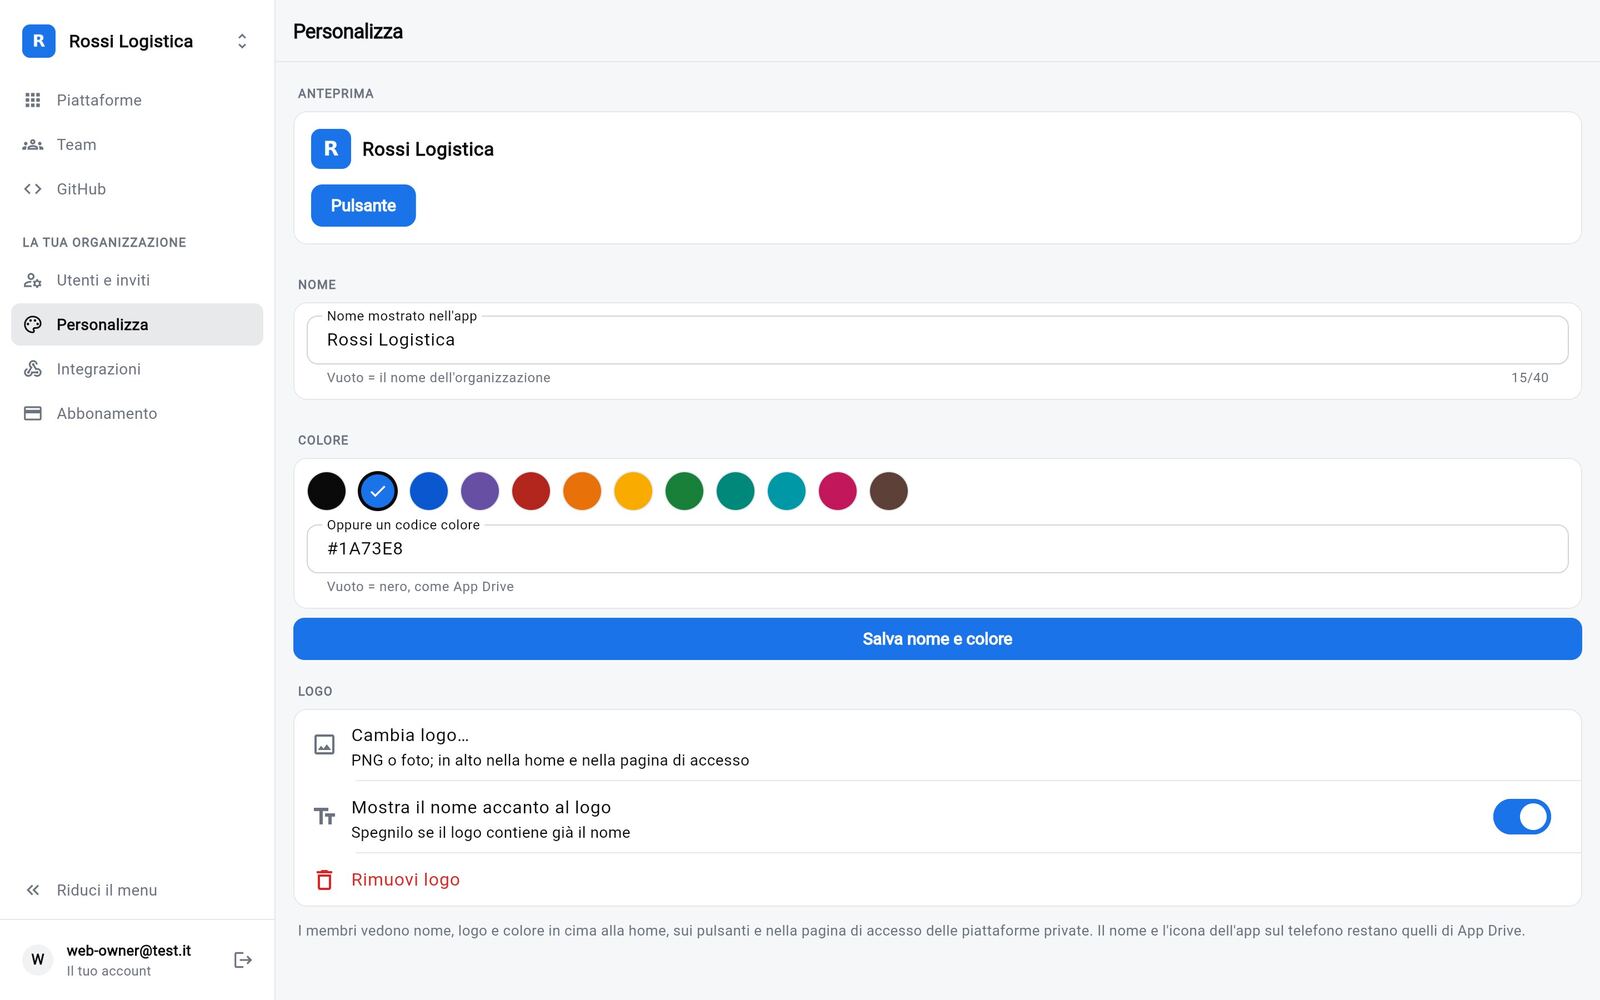
In Branding (administrators) you set the organization's name, color and logo. Users see them at the top of the home, on buttons, on the sign-in page and on the login page of restricted platforms. If the logo already includes the name, turn off Show the name next to the logo.
The server owner can customize each client from Client organizations (organization menu › Branding): each client then sees its own brand or the agency's.
Cloud data
Available on the Pro plan, for applications hosted by App Drive.
Applications built with AI usually store data in the browser: it stays on one device and is lost when changing phone or browser. With cloud data, App Drive stores it with no code changes.
Cloud data or Supabase? Cloud data is for applications with no back end, which keep everything in the browser. If the application already uses a database (Supabase, Firebase or its own server) it is not needed: the data stays where it is, and the page says so when it recognizes Supabase. Supabase functions and secrets are managed from Supabase back end.
Platform menu › Cloud data, then choose:
| Option | Behavior |
|---|---|
| Only in the browser | Default: each device keeps a separate copy. |
| Per user | Each user accesses their own data from all their devices. |
| Shared | All users of the application view and edit the same data, for example a shared log. |
- With cloud data the platform requires login: only the users and teams it is shared with get in. To make it public again, turn cloud data off first.
- On first activation App Drive imports the data already in the browser, with no loss.
- The same screen shows the storage used and offers export to JSON and full deletion.
- Limit of 5 MB per user (or per application, if data is shared). Sessions of other services (Supabase, Firebase) are never copied.
- In shared mode, other users' changes appear the next time the application is opened.
Platform databases
Applications made with AI tools keep their data in different ways. App Drive works with what the platform already uses, without moving the data and without changing the code:
| The platform's database | What App Drive does | Where to connect it |
|---|---|---|
| Supabase (Lovable, Bolt…) | Publishes the functions, checks the secrets, applies the database migrations, connects the login; its tables are available in the Overview | Platform menu › Supabase Back-End |
| PostgreSQL (Neon, Railway, a company server…) | Its tables in the Overview's cards and in flows | Platform menu › PostgreSQL database |
| Firestore (Firebase) | Its collections in the Overview's cards and in flows | Platform menu › Firebase (Firestore) |
The platform's menu shows only the entry of the database it uses: App Drive recognizes Supabase and Firebase from the published build and PostgreSQL from the GitHub repository (Prisma, Drizzle or a PostgreSQL driver among the dependencies), at every new version. When it does not, Connect a database appears and asks which one. Each platform uses one database: if one is already connected, the others are not offered. In every case App Drive reads only what it needs and adds data only when authorized: it never changes or deletes existing rows or documents (except the flows that update a record, in the chosen fields only). Credentials stay encrypted on the server and are never shown again.
Supabase Back-End: functions and secrets
Many applications built with Lovable, Bolt or similar tools use Supabase as their back end. From the platform menu, Supabase Back-End gathers what it takes to keep it in line. The data stays in the Supabase database: App Drive neither reads nor moves it (this is not Cloud data, described further on).
The entry appears only for platforms that use Supabase: App Drive tells by
itself at every new version, from the …supabase.co address in the build.
- Project: App Drive recognizes the project the application uses (from
the
…supabase.coaddress in the build or in the repository). Connect the account with an access token created at supabase.com › Account › Access tokens (stored encrypted) and confirm the suggested project. - Edge Functions: the functions in
supabase/functionsand those already deployed, with version and date. Deploy sends the function from the linked GitHub repository (its folder and the shared code in_shared), honoringverify_jwtinsupabase/config.toml. Under each function deployed by App Drive is its state: Matches the repository (the GitHub code is running: the button becomes Deploy again, only useful after changing a secret), Changes to deploy (the code changed), or, when someone deployed it from another tool, "cannot tell whether it matches". When a deploy fails, Diagnosis explains the cause with the AI and drafts the prompt for the tool the application was built with. With Deploy on every push on, after each build from GitHub the changed functions are deployed; unchanged ones stay as they are, and a failed one is retried only when its code changes. Results show on the same page and in the activity log. - Secrets: App Drive reads which keys the functions need
(
Deno.env.get) and flags those not yet set on the project. Set saves them straight to Supabase; Where to find them? uses the AI to say what they are and where to get them. App Drive neither keeps nor shows the values. A secret the app does not need (say, of an unused function) leaves the warnings with Ignore and comes back with Flag again; likewise Ignore on a failed deploy removes it from the badge until that function's next deploy. For secrets that are an address (allowed origin, site or redirect URL) App Drive already proposes the right value: the app's address. - Authentication URLs: after signing in and in e-mail links (confirmation,
new password) Supabase brings people back to the project's Site URL,
which in apps made with an AI tool is often still
localhost:3000or the tool's preview. App Drive points it out and Fix the configuration adds the published app's address to the allowed redirects and, only if the Site URL points to localhost or a preview, uses it as Site URL; a real domain already set stays. It also does so by itself when the project is linked. - Database migrations: the database changes the AI tool writes in
supabase/migrations. App Drive shows which are not applied yet and what each does in plain words ("creates the table orders", "DELETES the column…"). Apply the next one and Apply all run them in order, each in a transaction: if one fails it changes nothing and the next ones do not start. Those that delete data are in red and ask for one more confirmation. If the project does not record which are already applied (it happens when the AI tool applied them) and the app works, Mark as already applied records them without running them. Every outcome is The migrations run in the background: a box at the bottom right (at the bottom on smartphones) shows the progress and you can close the page and keep using the app (do not close the app or the browser, though: the migration under way finishes, the next ones start from there next time). When a decision is needed the box becomes an alert: if a migration creates something the database already has, Mark and continue marks it as applied and goes on with the next ones, Leave unchanged stops; ticking Mark the next ones already there this way too marks the next ones in the same situation without asking; Refuse takes it off the list and goes on with the next one. A migration you do not want can also be refused without trying it, from the button next to it: it is neither run nor marked as applied in the project, it leaves the list, the number on the icon and the alerts, and shows among the Refused, from where Restore brings it back among those to apply. If someone else applied it meanwhile, it leaves the list; on an error the box says so and Details shows Supabase's answer. They never run by themselves. After each push, if the new version brings migrations not yet applied, the app's icon on the home shows the number on the Supabase Back-End menu and the owner gets an alert (e-mail and notification) once per migration.
Automatic sign-in. For apps hosted on App Drive with Login required, Automatic sign-in to the application lets whoever opens the app in already signed in to its Supabase login, with the e-mail of their App Drive account: no second password. People who do not exist yet are created in the project's Supabase Auth (e-mail confirmed). It works with the standard Supabase login (supabase-js); the project keys stay on the App Drive server. Signing out in the app signs you in again the next time you open it from App Drive.
Migrations are read from the app's linked GitHub repository (the
supabase/migrations folder is not in the build): an app uploaded only as a
.zip does not show them. Until the feature is on on the server, run them from
Supabase with the SQL editor or supabase db push.
Connecting a PostgreSQL database
For platforms with their own PostgreSQL database (Neon, Railway, a company server…) and no Supabase: the platform's menu › PostgreSQL database. You must be able to publish the platform.
- A user for App Drive. The page shows the SQL commands to run in the database console (or to have the AI tool run): they create a user that can only read and add rows, with a password generated on the spot and already in the form.
- The connection. Paste the connection string (
postgresql://…) or fill in host, port, database, user, password and schema (usuallypublic). Connect and check tries the connection and counts the tables; the connection is saved only if it works.
Good to know:
- The connection is always encrypted (TLS) and the certificate is verified; verification can be turned off only if the database uses an unrecognized certificate.
- The database must be reachable from the internet: if it accepts only some IP addresses, allow the App Drive server's. Internal network addresses are not accepted.
- The password stays encrypted on the server and is never shown again; Change the connection asks for a new one.
- Once connected, its tables appear among the data of cards and flows, like Supabase's, with the same rules: only the chosen columns are read and new rows are inserted, never changes or deletions (except the flows that update a record, in the chosen fields only). If the platform already uses Supabase, the Supabase project applies.
Connecting Firestore (Firebase)
For platforms that keep their data in Firestore: the platform's menu › Firebase (Firestore). You must be able to publish the platform.
- A key for App Drive. In the Google Cloud console of the Firebase project open IAM & Admin › Service accounts, create an account (for example "appdrive") with the role Cloud Datastore User, then in Keys › Add key › Create new key › JSON download the file. The key generated by Firebase (Project settings › Service accounts) also works, but it gives access to the whole project: a dedicated account is better.
- The key. Choose the JSON file (or paste its content) and, only if the project has more than one Firestore database, say which one. Connect and check tries the key and counts the collections; the connection is saved only if it works.
Good to know:
- Collections appear among the data of cards and flows like tables: the fields (text, number, date, yes/no) are recognized from the latest documents; nested fields and arrays are not used.
- A flow can start from new documents if the collection has a field
with the creation time (
createdAt,created_at…, a timestamp or a number). Without it, the app offers the text to give the AI tool to add it. Documents created by a flow get their creation time. - Only the chosen fields are read (the latest 1,000 documents per card at most) and documents are added, never changed or deleted (except the flows that update a record, in the chosen fields only). Firestore security rules do not apply to the service account: the card shows the data to whoever can open the platform, so use a filter for personal data.
- Google counts every read in the Firebase project's plan.
- The key stays encrypted on the server and is never shown again; to revoke it, delete the key in the Google Cloud console.
- A platform uses one database: if it already has Supabase or PostgreSQL connected, that one applies.
Back-end checks and fixes
In the PostgreSQL database and Firebase (Firestore) pages, once the database is connected, the Checks section compares the database with the GitHub repository and says plainly what to fix. Check again repeats the check; the data read is not kept.
Firestore
- Security rules: "test mode" rules that expired or are about to (from
that date the app can no longer read or write), rules open to everyone,
rules that block everything, published rules that differ from the
firestore.rulesfile. Publish the repository's rules puts them in force; if the file has errors, Google rejects it and the current ones stay. - Indexes: indexes in error or being built, and indexes declared in
firestore.indexes.jsonbut not created (the cause of "The query requires an index"). Create the missing indexes creates them: they are ready in a few minutes. - Cloud Functions: functions in error and functions in the code but not
deployed. Publish the functions from the repository updates the ones
already published with the code of the
functionsfolder (triggers and settings stay; for TypeScript Google runs thebuildscript); publishing takes a few minutes and, if the build fails, the current version keeps running. A new function is published the first time with the Firebase CLI (firebase deploy --only functions). - Recent errors: the Cloud Functions' errors of the last 24 hours.
- Cloud Storage rules (only if the project uses Cloud Storage): the same
checks as Firestore's rules, on the files. If
firebase.jsonnames the file ("storage": {"rules": "storage.rules"}), Publish the repository's rules puts it in force on the project's bucket. - Login (only if the project uses Firebase Authentication): if the
platform's addresses, its own domain included, are not among the
authorized domains, signing in with Google, Apple or e-mail links from
the app online fails (
auth/unauthorized-domain). Authorize the app's addresses adds them; the ones already there stay.
For these checks the service account needs, besides Cloud Datastore User, the roles Firebase Rules Viewer, Logs Viewer, Cloud Functions Viewer and Firebase Authentication Viewer; for the fixes, Firebase Rules Admin, Cloud Datastore Index Admin and Firebase Authentication Admin, and for the functions Cloud Functions Developer and Service Account User. Without a role, the related check says which one to add (Google Cloud console › IAM).
PostgreSQL
- Migrations of Prisma (
prisma/migrations) or Drizzle (theoutfolder ofdrizzle.config, usuallydrizzle/): failed, or in the repository but not applied. Apply the migrations runs them in order, each in a transaction, recorded as the tool does (_prisma_migrationsordrizzle.__drizzle_migrations); a migration whose content is already in the database can be marked as applied. Refuse, next to each migration or when the app asks what to do, leaves it out without running it: it no longer counts among the things to fix nor in the alerts; Restore puts it back among those to apply. With Drizzle the migrations go in order even when marked: Drizzle counts as applied all those older than the last one recorded. Folders of plain.sqlfiles without Prisma or Drizzle are not handled: without a table that records what already ran, what is missing cannot be known reliably. - Schema: tables or columns of the Prisma schema missing from the database; tables without a primary key.
- Performance: foreign keys without an index. Create the indexes adds them.
- Rights: the App Drive user must not be able to change or delete rows.
- Usage: active connections and database size.
The App Drive user can only read and add rows: for migrations and indexes the app asks each time for the database owner's connection string, used for that change only and not saved.
The checks run again by themselves every 6 hours and after each build from GitHub: when they find something to fix, the platform's icon on the home shows the number, repeated on the database entry of the menu and, in the preview view, as "Database to review".
With the back-end alerts on, the platform's owner also gets an e-mail and a notification when these checks find a new problem: migrations to apply or failed, Cloud Functions in error, rules open, expired or expiring within 14 days, indexes missing or in error, app addresses not authorized in the login, Overview tables gone. Each problem is reported once; who may publish the platform gets the notification. The message opens the database page. They are turned off like the other alerts, in Account.
For both, Overview data: fields the cards use that are empty in most of the recent data, and tables or collections no longer there. Where the fix is in the code, Copy the prompt for the AI prepares the text to paste into the tool the platform was made with.
Users and access levels
Many platforms have more access levels: administrators who see and change everything, editors, plain users. From the platform's menu (long press on its icon), Users and access levels shows its levels and who has which, and lets you change it.
App Drive finds by itself where the platform's login keeps each person's level:
- Supabase or PostgreSQL: a column like
role,user_roleoris_adminin the users' or profiles' table (also as a Prisma enum or with a CHECK constraint listing the values), or a table with a row per role likeuser_roles(the schema Lovable uses); with Supabase also the users'app_metadata.role, if the policies use it. If there are more places, the one used by the platform's functions (e.g.has_role()) or policies comes first. In a table likeuser_roles, who gets a level from App Drive keeps only that one. - Firebase: a custom claim the security rules read (for example
request.auth.token.admin == true) or a field likerolein theusersorprofilescollection.
If it finds more than one, choose the right one from the drop-down. Tap a person's level to change it; if the platform does not list the possible values you can type another, the same as the code uses it. Only that value changes, nothing else.
- With PostgreSQL the App Drive user can only read: each change asks for
the database owner's connection (used for that change only and not
saved). To avoid it, the page shows the command that grants only that
permission (
GRANT UPDATE ("role") ON …). - With Firebase the custom claim applies from the person's next sign-in or within an hour; it needs the roles Firebase Authentication Viewer and, to change it, Firebase Authentication Admin.
- If the platform has one kind of user only, the page says so and prepares the prompt to ask the tool it was made with for the levels.
Login through App Drive. At the top of the page, the switch says whether who opens the platform from App Drive enters its login by itself (Automatic sign-in) and turns it on or off. It exists for Supabase and Firebase platforms hosted on App Drive with "Requires login" on; with PostgreSQL the page says it is not available (the login is the one written in the platform's code), but the levels can still be seen and changed.
Who can sign in through App Drive. In the same card choose who is signed in without a password: All users with access (owner, teams and users the platform is shared with; the default), Selected teams only, Selected users only or Owner only. The owner is always enabled. Other users sign in with the platform's credentials; on a public platform, if they use "Sign in with App Drive", a message explains that their account is not enabled.
Public platforms: "Sign in with App Drive". When the server has
FEATURE_PUBLIC_AUTO_LOGIN enabled, Automatic sign-in can also be enabled on
a platform without "Requires login", which stays open to everyone:
- authorized App Drive users who open it from the app are signed in without a password, as on a private platform;
- anyone opening the direct link without an App Drive session (for example after signing out of the platform) sees the Sign in with App Drive button at the bottom: they enter their App Drive credentials and come back to the same page already signed in;
- users without an App Drive account keep signing in with the platform's credentials and can dismiss the button.
The platform's owner customizes the button in the same card, below the switch:
- shown or hidden: when hidden, App Drive users are still signed in when they open the platform from the app;
- text: for example "Enter with Somio" (up to 40 characters, shown as entered in every language); if empty, "Sign in with App Drive" in the browser's language, with the agency's name when there is a custom brand;
- position: bottom right or bottom left.
When coming back from the App Drive sign-in, a Signing in… screen is shown instead of the platform's login until the platform has loaded the session (a few seconds at most).
Firebase, without touching the code. With Firebase, Automatic sign-in
is turned on only from here. App Drive looks the person up by e-mail in
Firebase Authentication (and makes them if missing, e-mail verified), gives
them the chosen level and signs them in: the session reaches the browser
where the Firebase SDK looks for it, before the platform starts. The
project's web key is read from the platform's files. Needed: the server with
FEATURE_FIREBASE_LOGIN, the service account with the role Firebase
Authentication Admin, and Firebase Authentication set up in the project.
If the browser already has another user signed in through the platform's own
login, Firebase keeps that one: sign out once.
Profile of who enters (Firebase). Before turning the switch on, choose
the profile with Set up: App Drive reads the platform's users collection
(users, user or similar) and shows its fields.
- Filled by App Drive: the e-mail, the login id, the chosen level and the date it was made, when the collection has them;
- To ask who enters: the other fields, with their type (text, number,
date, yes/no or a choice among the values found). Those in almost every
document are already ticked: untick or tick the ones you want. For yes/no
fields choose Request, Always yes, Always no or Leave out:
with Always yes or Always no App Drive writes the value in every new
profile. Then choose how the person sees it in the form: Hidden,
Shown, read only (seen, not changeable) or Shown, changeable (the
value is a proposal they may change). Fields like
activeorisActiveare already set to Always yes. Other fields can be preset too with Preset a value: a text (for examplestatus=pending), a number (for examplecredits= 0), one of the allowed choices or a date, fixed or Date of the first sign-in (always hidden). A preset field is not asked, with the same three display modes; - Profile creation by App Drive: on, App Drive makes the document of who enters for the first time; off, it writes nothing in Firestore and the platform makes the profile.
Until the profile is chosen, automatic sign-in cannot be turned on. At the first opening, whoever has no profile yet sees Complete your profile with the chosen fields; Save and continue makes their document (its id their uid). With nothing to ask, App Drive makes it at once, at sign-in.
If it does not sign in. When the automatic sign-in does not work, the platform shows an App Drive notice at the top and, on this page, the reason and what to do appear under the person (for example the service account's missing role, or a web key that accepts only some sites). Check the automatic sign-in tries it all from the server with your account, as at an opening, and says whether it works. If it works but the platform still shows its login, usually the platform signs out whoever has no profile: set up the profile above.
Who enters from App Drive (Supabase and Firebase). With Automatic sign-in (Supabase Back-End, or the switch above for Firebase), who opens the platform from App Drive enters its login without a password. In the section Access from App Drive choose with which level:
- for each App Drive person who may open the platform (you, the teams and the people it is shared with): the level is given at each of their sign-ins, before the session starts, and at once if they already entered;
- New users: the level of who has none chosen here, given only at the first sign-in; afterwards the platform decides (for example its admin panel);
- not set: App Drive does not touch the level.
Under each person, the outcome of their last sign-in: level given, or why it was not. Many platforms make the profile row only when the app first opens: then the level stays waiting and App Drive tries again every minute for 24 hours, until the row is there. If the platform never makes the profile by itself (profiles added by hand, for example), turn on Make the profile if missing: App Drive adds the row with the person, the chosen level and the e-mail if the table asks for it. If the table has other required columns App Drive cannot fill (a code, the company…), at the first opening of the platform the person sees Complete your profile (from the bottom on a phone, centred on a computer) with only those fields: text, number, date, yes/no, or a choice among the allowed values or the rows of the linked table (the companies, for example). Save and continue makes the profile with the chosen level and reloads the platform; Later leaves it to the next opening.
Profile fields (Supabase). With Make the profile if missing on, Set up shows the columns of the profiles table: those App Drive fills by itself (the person, the level, the e-mail, the database's default values), the required ones (always asked) and the others, to ask if you want. Fields are preset as with Firebase: yes/no, text, number, date (also the date of the first sign-in) or one of the values the table allows (enum, CHECK constraints, linked tables); a required column can be preset instead of asked. Without a setup App Drive asks only the required columns it cannot fill, as before.
People are read when you open the page and are not kept; each change stays in the activity log. It is for who may publish the platform.
Overview of the platforms (Hub)
For the plans that include it. Somio turns it on.
The Overview puts the cards of several platforms on one page: how many orders there are today, this month's revenue, the next deliveries, the status of each application. Open it from the menu, Overview; in the browser it is in the side menu. No need to touch the platforms' code.
- Every platform has a Status card: the live version, the date of the update and, with monitoring on, people and errors in the last 7 days.
- The page shows at once with every card in its place: each one shows a loading animation until its data is ready, then appears. A slow card (for example a business system that answers after a few seconds) no longer holds up the others; if it does not answer, the card says so and offers Retry. The same goes for dashboards.
- Other cards are made in the app, from the platforms' data (see below).
- Tapping a card opens its platform (the arrow next to the title shows it). At the top, the time of the last update and the button to refresh the cards; on a phone you can also pull down.
- Everyone sees only the cards of the platforms they can open.
Where it is. In the menu (in the browser, the side menu) Dashboard opens the Overview, the organization's first dashboard; ▾ next to its name moves to the other dashboards or makes a new one. Flows, AI agents, Business systems and Value tables are under Data and automations, each with its state in a word.
Adding a card. Add card (on a phone, + at the top) is the one door:
- Create a card: From which data? (a tap on a list, a table or a
system's entity), then Which card?: the cards those data allow, ready
and shown on the real data (the total in euros with its trend, by month,
by status, the latest records, how many). Add puts one on the
dashboard; Linked data prepares a "each customer with their orders"
card. Customize opens it to change it: in the preview each part is
outlined and changed by tapping it (the title is renamed, the number
chooses what to compute, the chart what to group by, how often and its
shape, the rows what to show); below, the same choices stay as a list,
already made from the fields' names and types (the
sum of the amount in euros, the date for the period, the status for the
comparison, the link between customers and orders, checked on the data)
and a tap changes any of them. Fields carry the name the ERP gives them.
The preview is always in sight; Advanced options opens the full editor
(see Views and dashboards).
- Add data from another source combines data in any card: each record gets the record of another source with the same value in a field (each order its customer), so you can compare sales by the customer's city. The link is proposed from the fields' names and checked on the data ("3 of 12 find their records: try another field").
- Only if keeps the records that matter, choosing among the field's real values (ticking Open and Released), a period for a date, more than or less than for a number; for a field holding emails, the person viewing the card shows everyone only their own.
- The card just added is brought into sight and lit for a moment.
- More calculations: a number is compared with the period before or the same period last year; a trend shows the value of each period, the running total or the moving average; a comparison shows the first N and the rest together as "Others". Dashboard periods include Year to date and Last 12 months.
- With a business system, the card's period and conditions on numbers are applied by the ERP itself: only the rows needed travel, faster and also with a lot of data. A card made this way is changed with the same questions (⋯ › Edit the card), already answered; the others open in the full editor.
- The apps' ready cards: the platforms' status and the cards declared by developers.
- Note and Section (a heading that groups the cards after it).
Editing, moving, resizing. Edit at the top (on a phone, the pencil) makes the page editable where it is: drag a card to move it (by its ⠿ handle on a computer, holding it on a phone) and drag its corner to make it 2 or 3 columns wide or taller; Done to finish. On each card, ⋯ on a computer or a long press on a phone: Edit the card, Duplicate the card, Move up or down, the Width (1, 2 or 3 columns) and Delete the card, or Remove from the Overview for the apps' ready cards; the menu is the same on every dashboard.
Card height. The cards of a row always have the same height, that of the longest, up to a limit: what does not fit fades out at the bottom, and tapping the card opens all the rows. A Tall card (in the menu, Height › Tall, or dragging its corner in Edit) has more room, and its row with it. A card alone on its row is as tall as its content. The cards made before the dashboards (a number or a list on a platform's or an ERP's data), with Edit the card become cards like the others, in the same place and with the same data, and are changed with the same questions.
A dashboard's card on the Overview too. In the menu of a card of another dashboard, Show on the Overview adds it at the end of the Overview: it is the same card, not a copy, and if you edit it, it changes in both places. On the Overview it has, under its title, the name of the dashboard it comes from (e.g. From Sales): tapping it opens that dashboard. There it shows the default period, without the dashboard's filters, and only who can see the dashboard sees it. Instead of Delete the card there is Remove from the Overview (also in the dashboard's menu): the card stays in its dashboard. If you delete it from the dashboard, it leaves the Overview too.
Admins manage the cards; for an agency's clients the agency manages the Overview, and the client's admins only if the agency allows it in Limits and permissions › Overview cards.
Finding a card. In the Overview everyone can search by title or platform, show one platform only (the All platforms menu) and choose the view: by sections (as whoever manages the Overview organized them) or by platform. These filters apply only to who uses them.
The cards show the data read from your platforms when you open them; no copy of it is kept.
Making a card without code
When choosing the cards, under each platform: New card.
-
Data: choose where to read from. The app offers what it finds:
-
the lists of the Cloud data (e.g. "orders"): turn it on in the platform page, and use the platform at least once;
-
the Supabase tables, if the platform has a linked Supabase project (see Supabase Back-End).
-
the tables of the platform's PostgreSQL database, if connected (see Connecting a PostgreSQL database in Platform databases).
-
the Firestore collections, if the platform has it connected (see Connecting Firestore in Platform databases).
For each source you see how many items it has and which fields, recognized from the data itself (text, number, date, yes/no).
-
-
Title and what it shows: How many (a number), Sum of a numeric field (e.g. the orders' total; with In euros it is shown with the € sign and two decimals) or a short List (row text, detail, order, 3 to 10 rows).
-
Filter by (optional): a date field today, this week, this month, from today on, before today; or a field equal to a value (e.g. status = "open", done = no).
-
For Supabase, authorize the reading: every time the Overview is opened only the columns the card uses are read (the newest 5,000 rows at most), and no copy is kept. Note: the card counts the whole table and shows it to whoever can open the platform, without Supabase's per-person access rules (RLS); for personal data use a filter or a summary table.
The platform uses neither Cloud data nor Supabase? In the new card, Copy the prompt for the AI: paste it into the tool it was made with (Lovable, Bolt, v0…), publish the new version and turn on Cloud data. Its lists will appear here.
Flows between platforms
When turned on on the server, with the Overview.
A flow connects two platforms: when something happens in one (e.g. a new order arrives), then another one receives the fields you choose (e.g. a new task appears). No AI and no code: the data always goes the same way, and the log tells how it went.
The data stays in your platforms. When you connect two apps, your space delivers from one to the other only the fields you chose: they travel encrypted and are deleted as soon as they are delivered. The log shows when and with which outcome, not the content.
Creating a flow. Data and automations › Flows › New flow: give it a name, then choose When and Then. A page opens with all the lists and tables, grouped by platform: search by table, platform or field name, or filter by Cloud data, Supabase, Developers.
Guided creation. New flow goes one step at a time: When, Only if (optional, can be skipped), Then, What goes through and Check and turn on. On a computer the summary in words stays on the right and updates as you choose.
- Fields already connected. At What goes through, target fields with the same
name as a source field, and a compatible type, are already connected. The
same goes for equivalent names in Italian and English
(
cliente/customer,totale/amount,telefono/phone…): these are marked Connected by a similar name: check it. Ids and creation dates are never connected automatically. Connect fields with the same name repeats it after a change, without touching the choices already made. - Try with the latest record. At the last step it shows the latest record of the source (only the fields used), whether it meets the conditions and what would arrive. Nothing is written, sent or kept. A table first needs the consent to access it. An incoming webhook or a developer event has no record to use.
- What is missing. Next says what to complete in that step. At the last step the list To create the flow, still missing takes you, with a tap, to the step to complete.
- The name is proposed from the two platforms (e.g. "Shop → Warehouse") and can be changed.
Editing an existing flow stays on a single page.
| When | Then |
|---|---|
| New item in the list of the Cloud data (e.g. an order added to "orders") | Add an item to the list of another platform's Cloud data (shared data): as if someone entered it by hand; it appears the next time it is opened |
| New row in the table of Supabase (checked every minute) | Create a new row in the table of Supabase: choose what to write in each column; the others stay empty or get their default value |
Under each choice the app explains what will happen, and at the bottom In short sums up the flow in one sentence (e.g. "When a new item arrives in "orders" in Orders, add an item to "tasks" in Tasks with: title = "Deliver {customer}"; done = no").
A table can start a flow only if it has a creation date (created_at,
inserted_at, created…) or a growing numeric id: otherwise new rows
cannot be told apart. Those without one are listed at the bottom as Not
usable, with Copy the prompt to add it to paste into Lovable or Bolt.
Then, field by field, what goes:
| Choice | Example |
|---|---|
| Not passed | The field stays empty. |
| Field of the source | due ← delivery (a date only goes into a date; anything can go into a text). |
| Fixed text | owner ← "Warehouse". |
| Text with the fields | title ← "Prepare order {number} for {customer}". |
| Yes / No, Fixed number | done ← No. |
Fields not chosen never leave the source platform. In a Cloud data list
you can also add a field it does not have yet; if the list's items have
an id, the new item gets the next one.
Good to know.
- A list without an
idfield: a changed item counts as a new one too. Lists made by Lovable, Bolt and the like usually have it; the prompt for the AI asks for it. - Only items and rows added after the flow was created count (and, for Supabase, after it was turned on again).
- If the target platform is open right when an item arrives, it does not lose it when it saves: the page reloads by itself as soon as nobody is typing.
- Supabase: authorize the access when you create the flow. Only the columns used are read and new rows are inserted: never changes or deletions (except the flows that update a record, below). The table's required columns (*) must be filled.
- Turning a flow off (the switch) cancels the pending deliveries. The Log shows for 30 days the date, flow, outcome (delivered, pending, expired, failed, cancelled), attempts and size.
- What does not arrive within 24 hours expires and is dropped: whoever made the flow (or, if they are gone, the admins) gets an e-mail and notification alert, at most once a day per flow, linking to the Overview.
Only if (conditions). Under When, Add a condition: the flow runs only for the records that meet all of them (up to 5). For each one choose the field, the rule and, when needed, the value:
| Field type | Rules |
|---|---|
| Text | is, is not, contains, is empty, is not empty (ignoring upper and lower case) |
| Number | is, is not, is greater than, is less than, is empty, is not empty |
| Yes/No | is yes, is no |
| Date | is empty, is not empty |
Example: only if status is "paid" and total is greater than 100.
Conditions are checked before delivery: records that do not meet them
never leave the source platform. They can be changed later by editing
the flow.
When a field changes. After choosing the source list or table, choose
New record (as above) or Field change and the field to follow
(e.g. status). The flow starts when that field of an existing record
changes value, once per change; new records are only remembered. With a
condition it becomes "when the status becomes shipped".
| Where | What it needs |
|---|---|
| Cloud data list | Items with an id field; seen when the page saves |
| Supabase or PostgreSQL table | A primary key; checked every minute (up to 5,000 rows) |
| Firestore collection | A field with the time of the last change (updatedAt): only changed documents are read, with no needless read costs |
To know what changed, App Drive keeps of each record only an encrypted fingerprint of the followed field, never the value.
Update a record. When the target is a table (Supabase, PostgreSQL or
Firestore), under Then choose Create a record or Update a record
and say how to find it: the field of the target table that must equal a
source field (e.g. code = the order's code). Only the fields chosen
in What goes are changed, never deletions; the field used to find the
record does not change.
- If the record is not there yet (e.g. another flow creates it), it is retried for 24 hours; the log says no matching record.
- If more than 20 records match, nothing is updated: choose a more specific field (a code, not a status).
- PostgreSQL: App Drive's user must be allowed to change the table
(
GRANT UPDATE ON table TO user;); otherwise the log says permission denied. - Trigger, table and matching field do not change after creation: to change them, create a new flow.
From outside (incoming webhook). A flow can also start from a service that is not one of your platforms: the contact form of your website, a Stripe payment, a Zapier or Make scenario. In When choose From outside › A call from an external service, write where it comes from (e.g. "Contact form") and declare the fields it sends, with their type (text, number, yes/no, date; up to 30). Then choose Then as for any flow.
When you save, the app shows the secret address only once
(https://<your-domain>/hub/in/hin_…) with an example to try it: paste it
into the service that sends the data.
- It accepts
POSTin JSON or from a web form (application/x-www-form-urlencoded), up to 64 KB. A form sends text: numbers and yes/no are converted. - Only the declared fields are taken; the others are ignored and not kept. Only if conditions apply here too.
- The address is the access key: treat it like a password. App Drive keeps only a fingerprint of the token; if you lose it or it was shared, Create a new address from the flow: the old one stops working at once. A flow that is off accepts no calls.
- It answers
202with the number of deliveries created (0 if the conditions are not met),404for an unknown address or a flow that is off.
Detect the fields from a test call. Instead of typing the fields, press the button: the app shows an address to enter in the service (e.g. Stripe › Developers › Webhooks) and waits for the first test event. When it arrives, it lists the fields found, nested ones too, with an example: choose the ones you need. The address listens for 30 minutes and becomes the flow's address, so you do not need to change it in the service. The call received is also used by Test.
- Path in the JSON. Each field can say where it is in the data (e.g.
data.object.customer_email, oritems.0.namefor the first item of a list). Without a path, the top-level field with that name is used. - Identifying field (duplicates). Many services repeat a call when they
get no answer in time. Choose the field that identifies the event (e.g.
idfor Stripe): a call with the same value within 24 hours is ignored and gets200withduplicate: true. - Service signature. With Stripe, GitHub or Shopify paste the signing
secret: App Drive accepts only calls really signed by the service (the
others get
401), even if the address ended up in the wrong hands. For Stripe the call must be recent (5 minutes). The secret is kept encrypted and never shown again. - Try. After the first call, Try uses the last one received in the past 24 hours to show what would be created, without writing anything.
- Calls. The flow's Calls button shows what happened to each call of the last 7 days (the 100 most recent): accepted, ignored (Only if conditions, duplicate) or refused (invalid signature, unreadable data, over 64 KB, too many calls, flow off), with the reason and the declared fields that were missing. Never the content. When there are refusals, the flow's card says so.
Assistant
When turned on on the server and for your organization.
The assistant prepares cards and flows from a request written as you would say it to a colleague: "today's deliveries and this month's revenue", "when a new contact arrives, create a task". Overview › Assistant (at the top).
- The first time, whoever manages the Overview turns it on; it is turned off from the menu of the same page. It follows the Integrations › AI switch and the organization's AI usage limits.
- What the AI sees: only the request and the names of the platforms, lists, tables and fields, with their type. Never the data: previews are made by your space after the answer. Do not write personal data in the request.
- Nothing changes without confirmation: each proposed card has Add (for Supabase after the authorization), each proposed flow opens already filled in under Review, to check and save.
- Proposals are checked like those made by hand: those using lists or fields that do not exist are discarded, and the page says so. With business systems linked, the assistant also knows their entities and field types (never the records): it can propose for example "how many customers do I have in Business Central" or "for each new customer in the ERP, a task in the app". Cards on systems ask for your authorization like those made by hand.
AI agents (MCP)
If enabled on the server, for those who manage the Overview.
An AI agent such as Claude (Claude Code, Claude Desktop, Cursor or an agent built by your company) can use the data of your platforms through the standard MCP protocol (Model Context Protocol): "how many orders came in today?", "list the contacts in Milan not called back yet", "add a task for Rossi".
Creating an access. Data and automations › AI agents (MCP) › New access:
- a name (e.g. "Maria's Claude");
- the platforms: all those you can open, or only some;
- what it can do: read only, or also add new records (items in the shared lists of Cloud data, rows in tables). Never changes or deletions; connected flows start as for any new record;
- the consent: the data the agent reads is sent to the AI service it uses (e.g. Anthropic for Claude), under its terms. Check that your organization's rules allow it.
The token is shown only once, with ready-made instructions:
claude mcp add --transport http appdrive https://<your-domain>/mcp \
  --header "Authorization: Bearer adm_…"
or, in configuration files (.mcp.json, Cursor and similar):
{"mcpServers": {"appdrive": {"type": "http", "url": "https://<your-domain>/mcp",
  "headers": {"Authorization": "Bearer adm_…"}}}}
What the agent sees.
| Tool | What it does |
|---|---|
list_platforms |
The platforms of the access with lists, tables and field names (no values) |
read_records |
The records of a list or table, newest first (up to 100), with optional fields and conditions |
get_overview |
The Overview cards, as text |
add_record |
Only with "add new records": a new record in a shared list or a table |
Good to know.
- The access acts as the person who created it: it sees only the platforms that person can open. If they no longer manage the Overview, or their account is suspended, the access stops working.
- No copies: each request reads the data as it is at that moment. App Drive keeps only a fingerprint of the token.
- Revoke it at any time: the agent loses access at once. Up to 10 accesses per organization and 120 requests a minute per access.
- The activity log records creation, revocation and every new record added by an agent (where, not the content).
Business systems (ERP)
Whoever manages the Overview can connect the organization's business systems. The feature is not part of the standard plans: it is available in the plans that include it. In Overview › Business systems, with Connect a system, first choose the system: App Drive uses the settings specific to each.
Microsoft Dynamics 365 Business Central:
- Environment (for example
Production, from the Business Central admin center) and company (optional if there is only one; otherwise, after the first check, App Drive shows the companies available); - Microsoft Entra ID: tenant, application (client) ID and client secret of an app registered in Entra ID and authorized in Business Central (Microsoft Entra Applications page) with a read-only permission set;
- App Drive uses the standard API v2.0: customers, vendors, items, sales and purchase orders and invoices, with names in words ("Sales invoices").
Oracle NetSuite:
- Account ID (Setup › Company › Company Information; for the sandbox,
for example
1234567_SB1); - Token-based authentication: consumer key and secret of an integration, token ID and secret of an access token. The token's role must be read-only with the REST Web Services and SuiteQL permissions;
- the catalog shows the record types (standard and custom); the fields of a record are read when you choose it, the data with SuiteQL.
Intuit QuickBooks Online (when on for the server):
- only a name is needed: when saving, Intuit opens, where an administrator of the QuickBooks company signs in and authorizes App Drive. No password is entered in App Drive; the connection can be revoked from QuickBooks or by unlinking the system (App Drive also revokes the authorization on Intuit);
- if the connection expires or is revoked, the system's row shows Connect QuickBooks to do it again;
- the catalog shows customers, invoices, payments, estimates, sales receipts, products and services, vendors and bills; flows can create new customers and vendors.
Epicor Kinetic:
- Service address of the REST API v2, with the company in the path (for
example
https://…/api/v2/odata/EPIC06/Erp.BO.CustomerSvc); - user and password and an API key (Epicor Kinetic › API Key Maintenance), sent with every request.
Microsoft Dynamics 365 Sales and Customer Service (Dataverse):
- Environment address, for example
https://contoso.crm4.dynamics.com(from the Power Platform admin center): App Drive uses the Dataverse Web API; - Microsoft Entra ID: tenant (ID or domain), application (client) ID and client secret of an app registered in Entra ID, added to the environment as an application user with a read-only role;
- the catalog shows the tables with their display names; the columns of a table are read when you choose it. Choice columns (status, industry…) show the displayed value ("Active", "Retail"), not the code.
SAP (S/4HANA cloud and on-premise, ECC with SAP Gateway):
- OData service URL, without parameters (for example
https://…/sap/opu/odata/sap/API_BUSINESS_PARTNER). App Drive reads the service catalog ($metadata) and shows entities and fields with SAP's own labels; - Client (
sap-client, three digits) and language (sap-language, two letters), optional: when empty, the system defaults apply; - Authentication: technical user and password, API key (for example the
SAP Business Accelerator Hub sandboxes, header
APIKey) or OAuth 2.0 client credentials (SAP BTP).
Other OData service: any OData v2 or v4 service (SAP Business One, SuccessFactors…), with the same authentication options as SAP.
Credentials are encrypted and can no longer be viewed. Save and check tests the connection at once; on failure the reason is shown (credentials rejected, wrong address, system unreachable…). Entities and data shows the catalog with a search and, for each entity, a preview of the first rows, read now and not stored.
If a system stops working. Every 6 hours App Drive checks the linked systems; if one that worked no longer answers as it should (credentials changed or expired, QuickBooks connection revoked, system unreachable), who linked it (or the admins) gets an e-mail alert, at most one a day, and the event is in the activity log. The periodic check also keeps the QuickBooks connection alive.
In the demo. "Try the demo" already shows a business system, Business Central (demo), with customers, items and sales orders made around today's date, and four cards in the "ERP" section of the Overview. It connects to nothing: the data is made by the App Drive server. You can make cards and flows (into the system too: the records stay in memory); you cannot change, unlink or add a system. Every night everything is restored.
Cards on business systems. In the Overview, with Add card › The apps' ready cards, every connected system appears next to the platforms: New card lets you pick an entity (for example "Business Partner" or "Account") and create a number, a sum or a list, as for the other sources. A card on a business system needs your explicit authorization, because the data read is visible to every user of the organization who opens the Overview. Data is read on the spot, page by page, up to 5,000 records (kept in memory for one minute) and not stored: numbers and sums are exact up to that limit; beyond it, the card shows for example "5,000+" and says on how many records it is computed. If the system does not answer, the card says so without blocking the Overview.
Opening the records of a card. Tapping a card of a business system
opens its records: those the card considers (same filter and order), with
search and "Show more". Tapping a record shows its fields. The Overview's
admins see all the fields of the record; the other users only those the
card already shows. With writing on in the server (FEATURE_HUB_SYSTEMS_WRITE)
admins can also change the record (only the changed fields are sent) or
create one with New record: it is written into the system at once, only in
the fields the system takes, and recorded in the activity log. No deletion.
Flows started by business systems. In Flows › New flow, under When, every entity of a linked system is a source: New record in "Customers" of Business Central starts the flow for each new customer (for example "new confirmed order → task in the warehouse app"); with changes on, also when a field changes. The system is read every 5 minutes (up to 5,000 records, only the fields used and the key); of each record App Drive keeps only an encrypted fingerprint, never the data, and the records already there when the flow is created do not start it. An explicit authorization is needed.
Flows that write into business systems. With the feature on for the server, in Flows › New flow the target can be an entity of a linked system, for example Create a record in "Sales orders" of Business Central: "new order in the app → sales order in Business Central", "new contact → customer in NetSuite". Fields are chosen as for the other targets (a field of the source, a fixed or composed text, a number); the fields the system fills itself (keys, modification dates) are not offered. The flow needs an explicit authorization and only creates new records: no changes or deletions. If the system refuses a record (a required field missing, a value not valid), it is not tried again and the reason appears in the flow log; if the system does not answer, it is tried again for 24 hours. Business Central, NetSuite, Epicor, Dynamics 365 and the other OData services are supported; SAP not yet. To write, the system's technical user (or app) needs create permissions on the entities used only.
Keeping a record in step. When the source is a list of the cloud Data
(with an id field) or a table (with a primary key) and changes in flows
are on as well, a target on a system offers Create and keep in step: the
first save of a record in the app creates the record in the system; later
changes to the fields the flow uses update that same record (for example
"customer in the app → customer in Business Central": change the address in
the app, it changes in Business Central). App Drive remembers the link
between the two records keeping only an encrypted fingerprint of the app's
record and the encrypted key of the record in the system. Records already
there are created at their first change; a change in a field not used sends
nothing. If the record was deleted in the system, the change is refused
(with the reason in the log) and it is not created again. No deletion is
ever sent. Supported: Business Central, NetSuite, QuickBooks (customers and
vendors), Dynamics 365, Epicor and the other OData v4 services. To update,
the system's technical user also needs change permission on the entities
used. The flow's card shows how many records are kept in step.
Cards and previews are read-only; writing happens only through the flows described above, when on. Use a dedicated technical user with only the read permissions needed. The system must be reachable from the internet (a dedicated connector for systems inside the company network is in development). For SAP, check with your account manager that access from external applications is covered by your licenses. Connections, changes, checks, previews and cards are recorded in the activity log.
Cards and dashboards
A card can join the data of several sources: the cloud Data lists, the Supabase, PostgreSQL or Firestore tables and the entities of the business systems, also of different systems. Examples: Business Central's categories with their products; the app's orders with the customer's city from the ERP; this month's sales against the month before.
Making a card with the full editor. From Create a card › Advanced options. The editor has three steps and the preview always in sight:
-
Data. Choose the data to start from (one row per record), then Link more data (at most 4 sources):
- App Drive proposes the link from the fields' names (e.g.
CategoryIDwithCategoryID); - choose One record per row (e.g. for each product its category: its fields are added to the row) or Many records per row (e.g. for each category its products);
- the preview says how many rows find their record (e.g. 8 rows out of 8). Values are compared regardless of spaces, case and leading zeros.
The value tables typed in App Drive are sources too (see below).
- App Drive proposes the link from the fields' names (e.g.
-
Compute.
- Calculated fields (up to 5), with a formula:
a.price - a.cost,round(a.total * 1.22; 2),days(a.due)(days from a date to today),if(a.total > 1000; "large"; "small"),band(a.total; 100; 500; 1000)(bands),concat,year,month,min,max,abs. It is a closed language, never code that runs: a missing value gives an empty field, not an error. - Filters: equals, is not, contains, is one of (
a, b, c), greater, less, between (from;to, dates too), empty, is the viewer (the e-mail field is the one of who opens the dashboard: "my records") and the periods: today, week, month, last 7, 30 and 90 days, quarter, year, last month, last year, from today on, before today. - Group by a field; for a date, by day, week, month, quarter or year (periods without data show as empty, so the trend does not skip). Columns: a second grouping, for the pivot table and charts with more series (e.g. agents × month).
- Totals (up to 6): count, sum, average, minimum, maximum, distinct values, ratio % of two totals (e.g. margin on sales) and share of total %.
- Sorting, the date that follows the dashboard's period and which field follows each dashboard filter.
- Calculated fields (up to 5), with a formula:
-
Show.
- Number, with the comparison with the period before, the trend of the last six months and thresholds (green, amber, red: red above amber when higher is worse, below when lower is worse).
- Goal (a bar toward a value).
- List and Groups (each group with its records under it).
- Table (up to 6 columns, sorted by tapping a heading, totals at the bottom, rows coloured by the thresholds).
- Pivot (rows × columns with their totals).
- Chart: bars, side-by-side or stacked bars, lines, area, pie; more series with More values or with the columns chosen in Compute.
- Number format for each total: currency (€), percentage, whole number, two decimals, compact (12.4k).
- Width on the dashboard (1, 2 or 3 columns) and tall card.
A card can also be a text note (bold, lists with
-, headings with#) with no data.
The reading of the fields used, shown together to who sees the card, must be
authorized. Tapping a card opens its rows, with search, consistent with
the card: on top its chart or number, whole; for a card with groups, each
group with all its records under it. Tapping a bar, a slice or a
group (in the card or on the rows page) keeps only the rows of that group
(drill-down), with Only: … on top and the × to go back to all of
them. From the rows, Export to CSV (separated by ;, opens in Excel; for a
card with groups, a line per record with the values of its group). No data is
copied: the sources are read at each opening (kept a minute, up to 5,000
records per source).
Dashboards. Dashboard › ▾ next to the name: besides the Overview, more dashboards per department or role, each with a name, an icon and who sees it: the whole organization, the chosen teams or only who made it.
- Period, the first button at the top (All, Today, Week, Month, 30 days, Quarter, Year, Last year, From… to…): it applies to every card with a date, with the comparison with the period before. Next to it, one button per filter; a chosen filter is cleared with its ×.
- Filters on top (up to 4, e.g. Customer, Agent, Area): set in Edit dashboard; in each card you choose which field follows each filter. Choosing a value filters every card that follows it.
- Each card takes 1, 2 or 3 columns of the grid; sections (… › New section) separate groups of cards.
- With … on each card you change it, duplicate it, change its width, move it or delete it; … › Arrange reorders the cards by dragging; … › Duplicate the dashboard makes a copy visible only to you.
Each person sees a card only if they can open the platforms it reads; business systems' data as the organization's plan allows.
Value tables. Data and automations › Value tables: small tables for the values that are in no system, such as goals by agent, the monthly budget or a price list (up to 12 text, number or date columns and 500 rows). Rows are typed or pasted from Excel. They are used as the source of a card and linked to the other data by a shared field (e.g. the goal by agent next to the sales by agent). The values are stored encrypted; a table used by a card cannot be deleted.
Cards, dashboards and tables are made by who manages the Overview; every
creation, change, opening and export of the rows is in the activity log.
Turned on with FEATURE_HUB_VIEWS.
Prepared data and measures. Data and automations › Prepared data: join the data once, give it a name, and every card can use it like any other source. For example, "Orders with customer" is the ERP's orders, each with its customer's city and agent, without the cancelled ones.
- Data: start from one source, one row for each of its records. Add data from another source adds the linked record to each row. When the ERP declares the relation (Business Central, SAP, Dynamics), that link is used and marked from the ERP; otherwise it is proposed from the fields' names. Next to the link you see how many rows find their record and how many find more than one: in that case the field is not unique and the totals would be wrong.
- Measures: the numbers that matter, defined once. A measure is How many, Sum, Average, Minimum, Maximum or Distinct values of a field, or a Percentage or a Divided between two measures (e.g. Average order = Sales divided by Orders), with its own format (euros, %, integer). Cards use it by name: fix it once and every card follows. A measure used by a card cannot be removed.
- Calculated fields (e.g. Net = Total / 1.22) and Only if (e.g. without the cancelled orders) apply to every card.
- Preview: the measures with their values and the table of rows, always in sight. Tap a column name to rename it.
A measure can also be a Formula of other measures (e.g. Margin % = (Revenue − Costs) / Revenue × 100), written by tapping the measures to insert.
In Create a card, prepared data comes first, and the proposed cards use
its measures ("Sales by month", "Sales by customer city"). The data stays in
its sources and is read at each opening, as for cards; prepared data used
by a card cannot be deleted. Turned on with FEATURE_HUB_DATASETS.
History of the measures. In prepared data, History › Keep the
history of the measures: every day the values of the measures are kept
(sales, orders, stock, customer balances), never the rows, encrypted and for
the time chosen (3 months, 1 year, 2 years). So you see how numbers the ERP
does not date, such as stock and balances, change over time. Today's value is
recorded at once; past days cannot be rebuilt. In Create a card "… ·
history" appears, with the measures day by day. Turning the history off
deletes the recorded values at once. Turned on with FEATURE_HUB_HISTORY.
For developers: manifest, script and webhook
Who develops the platforms can also declare cards, events and actions in an
appdrive-hub.json file next to index.html (cards read the Cloud data):
{
  "version": 1,
  "cards": {
    "orders-today": {
      "title": {"it": "Ordini di oggi", "en": "Today's orders"},
      "source": "cloud:orders",
      "template": "metric",
      "where": {"field": "delivery", "is": "today"},
      "label": {"it": "ordini", "en": "orders"}
    },
    "next-deliveries": {
      "title": "Next deliveries",
      "source": "cloud:orders",
      "template": "list",
      "where": {"field": "delivery", "is": "future"},
      "sort": {"field": "delivery"},
      "item": {"title": "customer", "detail": "delivery"},
      "limit": 5
    }
  }
}
| Field | Meaning |
|---|---|
source |
cloud: followed by the key the application saves its data under in the browser (localStorage). The value must be JSON: a list of objects, an object of objects or a number. |
path |
Optional: where the list is inside the JSON ("orders", "data.orders"). |
template |
metric (a number) or list (a short list). |
where |
Optional: {"field": "...", "is": "today"} (also week, month, future, past) for dates, or {"field": "...", "equals": "open"}. |
sum |
For metric: adds up this field instead of counting the items. |
sort, limit |
For list: order ("desc": true to reverse it) and rows shown, 1 to 10. |
item |
For list: the title field and, optionally, the detail field. |
title, label |
Texts in one language or {"it": ..., "en": ...}. |
- At most 12 cards per platform; dates and numbers are shown in the app's language, dates as in Italian time.
- The file applies to the live version: with a new version or a rollback the cards follow that version.
- Mistakes in the file appear when choosing the cards, under the platform; the platform keeps working as before.
- Events and actions (
events,actions, fieldsstring,number,boolean,date) appear in flows as "(developers)". The platform includes the script and uses them in its code; an action can also go at once to an https webhook of the back end, signed like the reports' webhooks (x-appdrive-signature; the secret is shown only once). The platforms must ask for the login.
<script src="/__appdrive/hub.js"></script>
// Source platform: says when it happens (only what the flows use leaves it).
AppDrive.emit('order.created', { number: 1042, customer: 'Rossi', delivery: '2026-10-21' });

// Target platform: what to do when the action arrives.
AppDrive.on('task.create', async (data, info) => {
  // info.id is unique: use it to avoid duplicates.
  await saveTask({ ...data, ref: info.id });
});
If the function throws, the delivery is tried again later (5 times at
most). With no active flows, emit sends nothing.
Partner agencies and clients
Reserved for partner agencies, subject to activation.
How to become a partner. If your organization already uses App Drive, an administrator opens the ⋯ menu › Become a partner (where available) and:
- enters the agency details: company name, European Union VAT number, registered address, contact person and billing e-mail;
- reads the partnership agreement, accepts it and signs with their full name;
- presses Sign and become a partner: activation is immediate, on the Partner Start plan (see Plans and subscription). Nothing is paid during the beta.
The VAT number is checked at once for its format and then on the European VIES service; if VIES does not answer, the check is repeated every day without blocking anything. Its state is in Clients › Partner profile (icon at the top), with the signed agreement. Connecting Stripe to collect from clients comes later, only when needed (Clients › Payments from clients): the first client can be created without it.
From there the organization can go back to a plain organization, as long as it has no client spaces and no active Partner Start subscription. Somio may suspend the partnership (existing clients keep working, but no new ones can be added and no new payments requested) or revoke it, always giving a reason, which appears in Partner profile.
If you do not use App Drive yet, apply from the form on the home page choosing Partner programme (agencies), or write to tickets@somio.it.
From the ⋯ menu › Clients the agency manages its clients independently:
- Add client: enter the name and optionally the contact person's e-mail. The client immediately gets an isolated space, with the agency's logo and color if "With my brand" is on. The agency is its administrator (access from the organization switcher or with Join); the contact person receives an administrator invitation.
- For each client you see apps, users, estimated monthly cost and, if you set your markup, the client price.
- You can suspend, reactivate or rename a client, invite further administrators and remove a client with no platforms.
Client templates. From the menu of a client already set up, Save as template stores limits and permissions, contract and fee and one-time payments. In Add client, Starting template creates the new client set up the same way.
Payments directly in App Drive. Where the activation provides for it, in Payments from clients the agency connects its Stripe account (a guided Stripe procedure, done once) and drafts its Contracts; it then configures, for each client, Contract and fee and One-time payments (for example activation). The client must sign the contract and settle the amounts before accessing the applications; if payment stops, access is suspended automatically. Payments are credited to the agency's Stripe account; signatures are available in Signatures.
For each client the agency also sets Limits and permissions: how many platforms the client may publish (with 0 only the agency publishes), the maximum number of users, and whether the client may invite new users, change the branding or configure integrations. New clients start with branding and integrations managed by the agency. The limits are included in the contract the client signs, and the client sees the agency's name under its own.
Billing is centralized: client applications are included in the agency's "Pay per use" or "Partner Start" subscription (see Plans and subscription › Partner Start). Clients do not see the Subscription section; if the agency's payment fails, its clients are suspended with it and reactivated once it is settled.
Monthly report to clients
For partner agencies, where available.
On the 1st of each month App Drive prepares each client's report for the month just ended, with the agency's brand (name, color and logo; never App Drive's): platforms, opens (compared with the previous month), devices, new versions, errors, reports and problems solved. It contains totals only: no names or e-mail addresses of who uses the platforms.
From ⋯ › Monthly reports the agency:
- opens each client's report, adds a note (at the top) and sends it, or chooses Do not send this month;
- from Settings per client turns the report off, has it sent by itself on the 1st or chooses the e-mail to send it to (otherwise it goes to the client's administrators);
- sees whether the client read it, and its comment.
The client receives an e-mail with the agency's brand and the PDF attached, and finds the reports in ⋯ › Monthly reports, where it can press All clear and leave a comment for the agency.
Errors and usage with AI
Usage statistics on every plan; errors, issues and AI on the Pro and "Pay per use" plans. For applications hosted by App Drive.
App Drive monitors applications automatically, with no installation or code changes. For every hosted platform it tracks opens and collects the errors its pages raise in the browser.
Platform menu › Errors and usage:
- Opens, visitors and users with access over the last 7, 14 or 30 days, with the daily trend.
- Errors and error-free visitors (the share of visitors who encountered no error): a value below 95% indicates an issue to address.
- Issues: with Analyze with AI, errors and reports ("Report") are grouped into issues, with severity (critical, high, medium, low), probable cause and recommended actions.
- Fix: for each issue the AI prepares the fix.
- If the code is on GitHub, it applies the fix on a new branch and opens the pull request: after review and merge, the build starts automatically.
- Otherwise it provides a prompt to use in the tool the application was built with (Lovable, Bolt, Cursor, v0).
- Verification: when the new version is published the issue moves to Checking on the new version. If the error does not recur for two days the issue closes automatically; otherwise it reopens marked Back after the fix.
- Active users: for applications with login, users and frequency of use are shown.
By default errors, reports and usage are visible to the owner and to those who can edit the platform. In Sharing and access › Monitoring the owner can turn on Share errors and usage: people and teams with "Can view" then see the dashboard too, read only (no AI analysis, fixes or status changes).
From the ⋯ menu › App status you can compare all applications: those with urgent issues first, with opens, errors and the trend over the last two weeks. When there are new errors the ⋯ menu shows an indicator and the item shows their number: selecting it opens the errors (directly those of the application, if there is only one) and resets the counter.
In each application's menu, Errors and usage and Reports from the site (SDK) are grouped under Monitoring.
Build diagnosis
If a GitHub build fails, Diagnose appears next to the build in GitHub and publishing: the AI analyzes the log and explains the cause and the recommended actions. If a build variable is missing, you can add it directly (Add followed by the variable name) and confirm with Save and rebuild; if the code must change, a prompt for your development tool is provided, along with Fix on GitHub: the AI prepares the change on a branch and opens the pull request page, to accept with one click.
Back to the previous version
If after a new version errors grow clearly compared with the previous one, Errors and usage shows a warning with Back to version N: the previous version goes back online at once, for everyone, while you fix it. The current version stays saved.
AI limits
To keep costs under control, requests to the AI (error analysis, diagnoses, fixes, secrets guidance) have a monthly limit per organization and a daily limit per person. Answers already available, such as the diagnosis of a build already analyzed, do not count. This month's usage is shown in Integrations › AI, together with the requests you made today, and the count resets on the 1st.
Whoever runs the server finds in Server › Organizations the AI this month box: requests and tokens used on the whole server, with the default limits. Each organization shows its own use; from the ⋯ button › Monthly AI limit you give it a different limit (empty to go back to the default, 0 for none).
AI and data
The AI is Anthropic's Claude. It receives logs, errors and (for pull requests) project files only on explicit request; build variable values never leave App Drive. Administrators can turn it off for the whole organization in Integrations › AI. Errors are kept for 40 days, reports for 90; visitors are anonymous (a random browser identifier) and users are identified only in applications with login.
Reports and integrations
Available on the Pro plan.
The Report button
On every platform, in the App Drive bar outside the platform itself, there is a Report button. The user selects Bug or Change, describes the case and confirms with Send. App Drive automatically adds platform, page, author, screen and browser, making screenshots and manual descriptions of the context unnecessary.
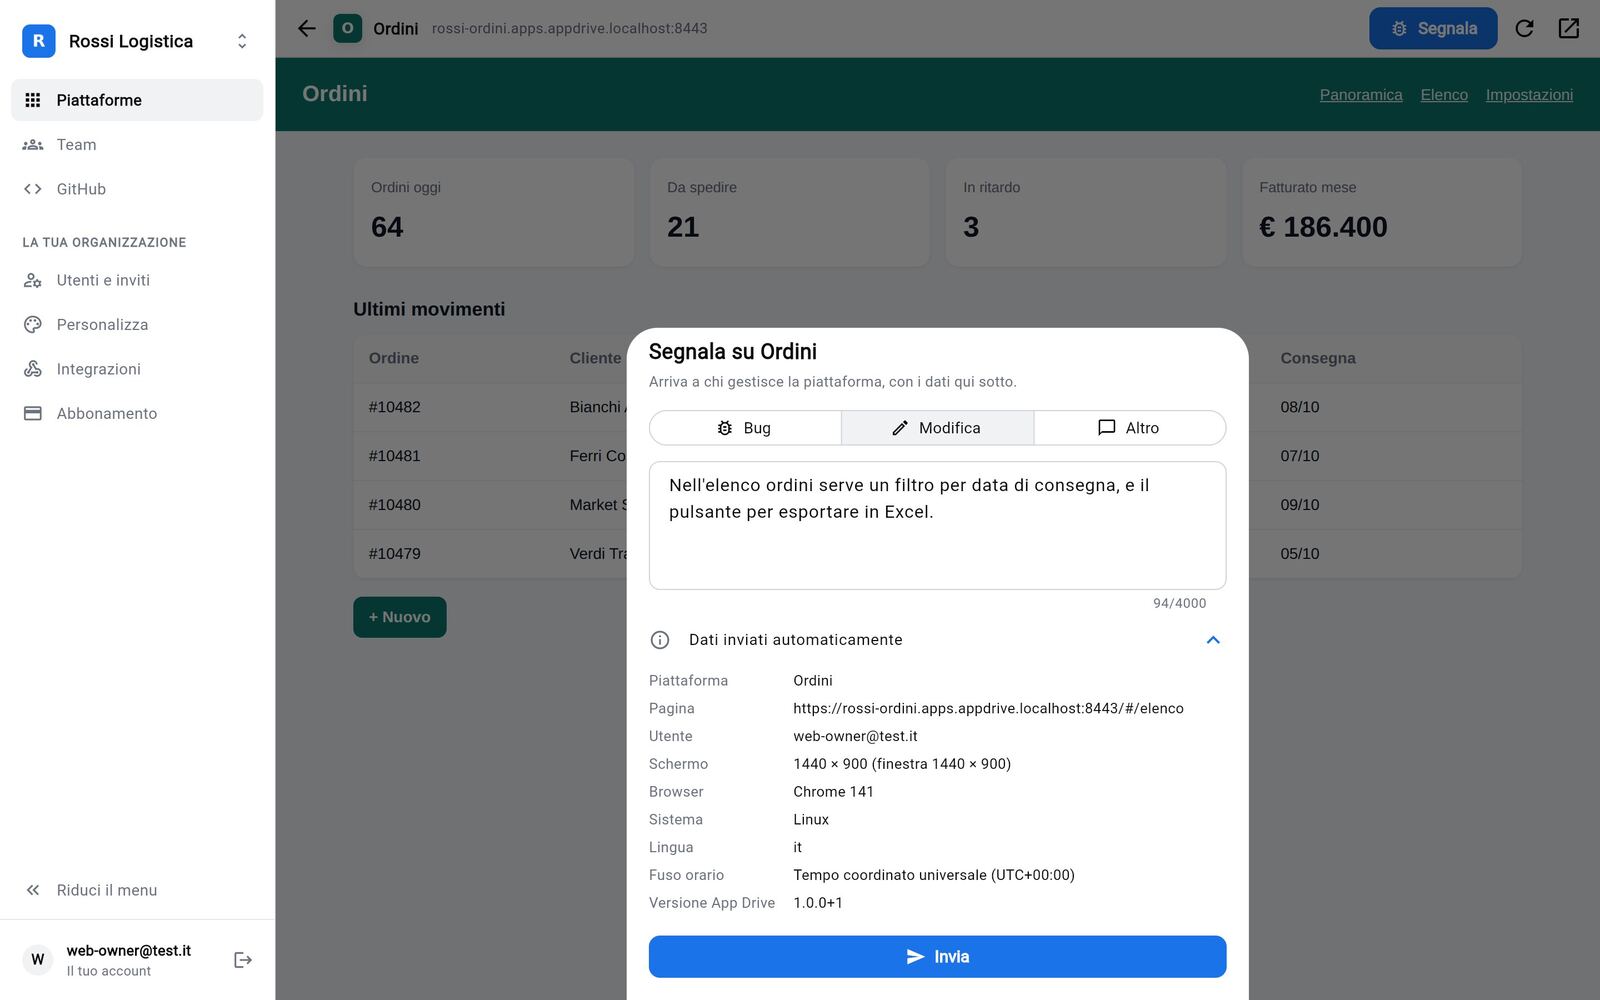
Where reports are delivered
In Integrations (administrators) enter a webhook address and select Send a test:
| Tool | Setup |
|---|---|
| Slack | Create an Incoming Webhook for the channel and enter its address: the message arrives already formatted. |
| Zapier or Make | Use Webhooks by Zapier – Catch Hook or the Custom webhook module, then forward the report to the desired destination: Trello, Linear, Jira, e-mail or spreadsheets. |
| n8n or a dedicated server | Receives a JSON with kind, message, app, user and context, signed with the secret shown on the page. |
Without a webhook, reports are e-mailed to whoever published the platform. If a delivery fails, App Drive retries for a few seconds and then falls back to e-mail; the outcome of the latest delivery is shown in Integrations.
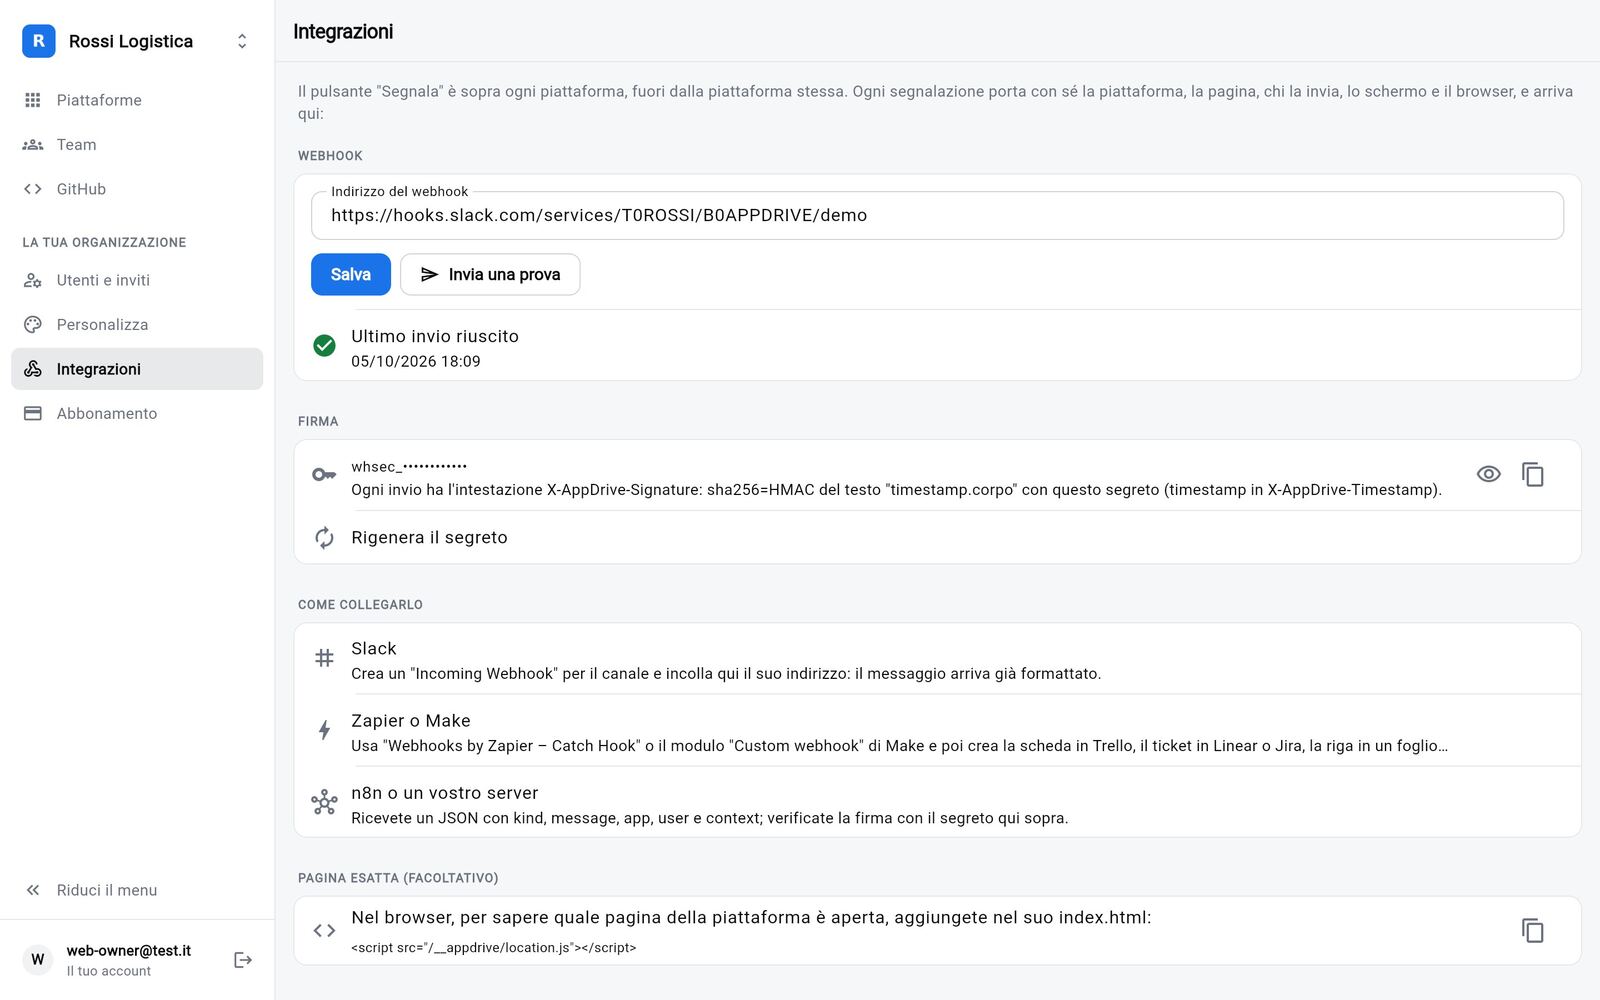
Plans and subscription
| Base | Pro | Pay per use | |
|---|---|---|---|
| Price (beta, excluding VAT) | €99/month | €249/month | €0.47 per platform per day, no fixed fee |
| Platforms per organization | up to 7 | up to 17 | no preset limit |
| Storage per organization | 1 GB | 3 GB | 10 GB |
| Branded portal, hosting, GitHub and .zip | ✓ | ✓ | ✓ |
| Applications from an address, Vercel and Netlify | ✓ | ✓ | ✓ |
| Users, teams, sharing, permissions, multiple organizations | ✓ | ✓ | ✓ |
| Report button and webhooks | — | ✓ | ✓ |
| Cloud data | — | ✓ | ✓ |
| Opens and usage of every application | ✓ | ✓ | ✓ |
| AI diagnosis of builds and errors, with fixes | — | ✓ | ✓ |
No cost per user. The beta price remains guaranteed for companies joining now.
Pay per use
Suited to a small number of applications or temporary projects: no fixed fee, you pay for active platforms day by day, invoiced at month end. The daily count includes all of the organization's platforms (archived ones too, which stay online for other users); once a platform is deleted, charges stop from the following day. Features are those of the Pro plan. Subscription shows the price per platform per day, today's platforms and the estimate for the period and for the end of the month if nothing changes; the exact amount is on the Stripe invoice. A platform active all month costs about €14 (€0.47 × 30 days), counted by the day.
Tailored plan
An organization can have an agreed plan, with its own features and limits: the features turn on as soon as the plan is assigned. In Subscription the plan shows with its name and, depending on the agreement:
- its own price: it is the only plan offered, with its monthly or yearly price; Subscribe opens Stripe's payment page, as for the other plans (web version);
- payment as agreed: nothing to pay from the app (bank transfer or invoice), no reminders and no suspension;
- like Base and Pro: Base or Pro is chosen and paid as usual; the tailored plan only changes features and limits.
Partner Start
For partner agencies only: a fixed fee that includes some platforms (your clients' count too) and a number of client spaces; platforms beyond those included are pay per use, about €14 per app a month, counted by the day. Features are those of the Pro plan. The fee and what it includes are shown in Subscription and may change over time.
- Before choosing, Subscription shows what a month would cost with today's platforms; after choosing, the estimate for the period and for the end of the month.
- Once the included client spaces are used, no more can be created: for more, switch to Pay per use, which has no limit.
- Switching between Partner Start and the other plans loses no data: platforms, clients and settings stay as they are.
- In the Clients panel the estimated monthly cost includes the fee and only the platforms beyond those included.
During and after the beta
- Until 31 January 2027 App Drive can be used without a subscription, with all Pro features.
- 30 days before the deadline administrators receive a notice.
- After 31 January the administrator is taken to Subscription to choose a plan; for 7 days the app keeps working normally. After that, without a subscription, the organization is suspended: access is blocked and platforms go offline, but no data is deleted.
Notices are shown to administrators only, as they are the only ones able to pay.
Paying and managing the subscription
In Subscription (administrators, in the browser) you choose Base, Pro or Pay per use and pay through Stripe: App Drive has no access to card details. From Card, invoices and cancellation you update the payment method, download receipts or cancel. Plans can be changed at any time: the difference appears on the next invoice.
If a payment fails, Stripe retries for a few days and platforms stay online. If the subscription remains unpaid or is cancelled, the organization is suspended. To reactivate it, select Pay and reactivate on the sign-in page: once payment is complete, everything becomes available again.
Moving from Pro to Base deletes no data: it only prevents new platforms and uploads beyond the Base limits.
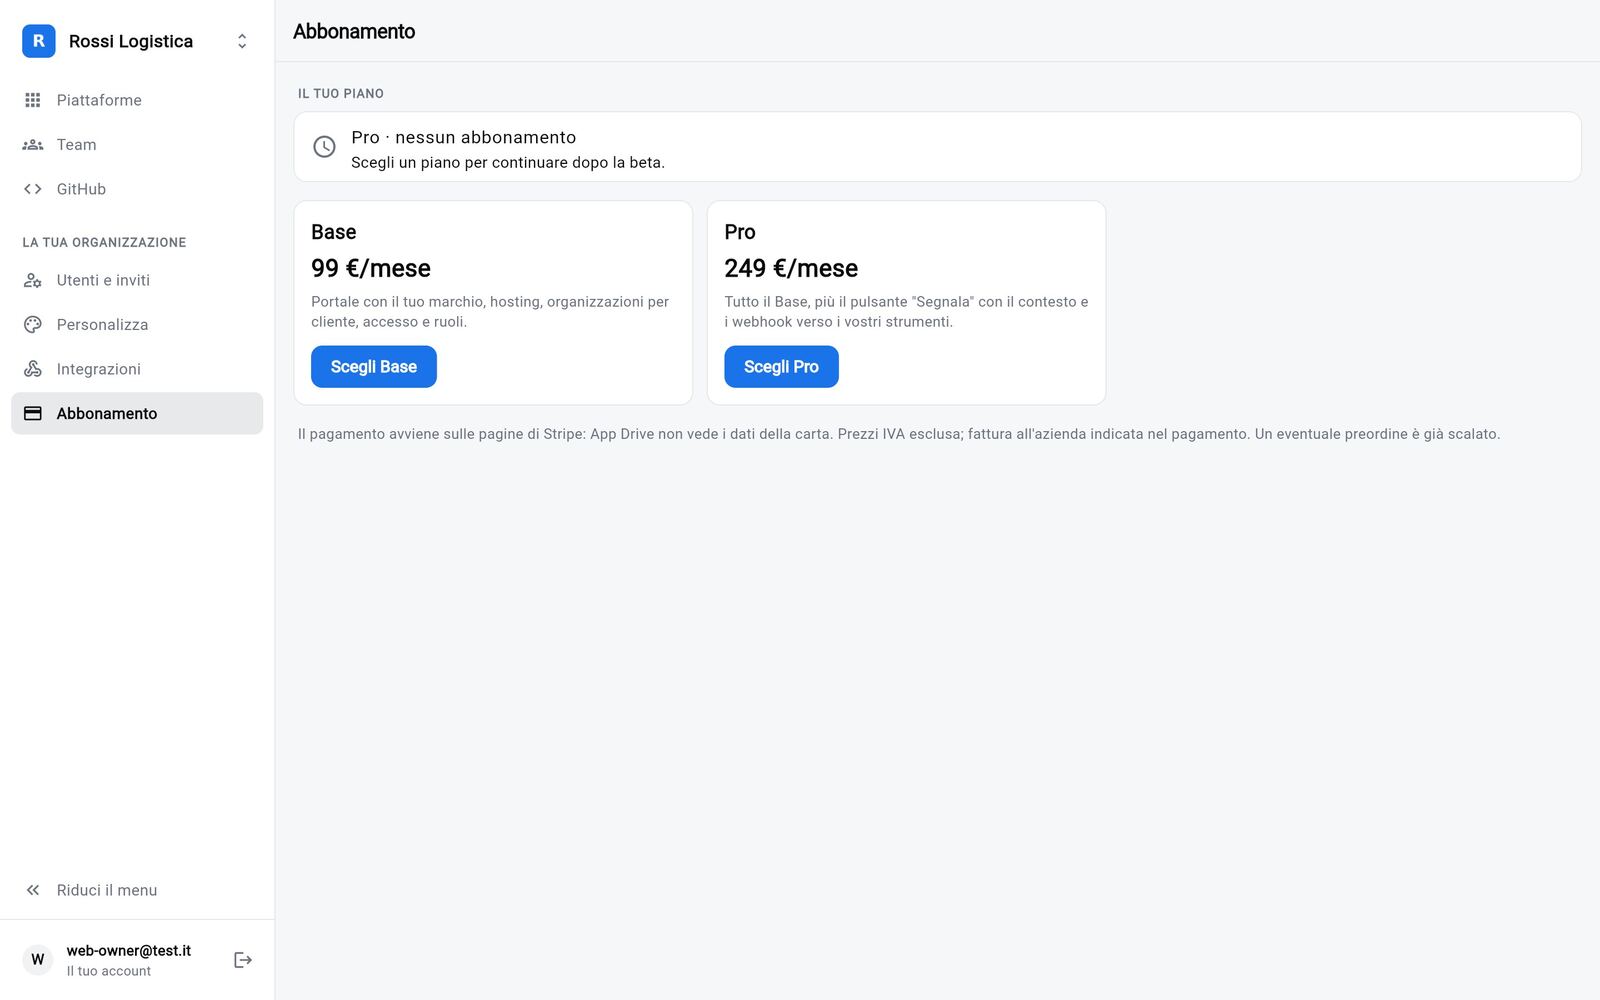
The iPhone and Android apps show only the subscription status: payments are made in the browser.
Account
In Account (in the browser at the bottom left; on smartphones the first item of the ⋯ menu):
- storage and platforms used against the limits;
- password change, which closes active sessions on other devices;
- two-step verification (optional): see below;
- language: automatic (the device's), Italian or English;
- my organizations, to switch organization, join with a code or leave one;
- delete account: deletes the account and its platforms in every organization;
- e-mail alerts: the owner of an app receives failed builds, errors never seen before, Supabase functions not deployed and database migrations to apply, with a link to App Drive; each event once. They are turned off with the same switch. Send a test e-mail shows how they arrive. E-mails carry App Drive's look or, when the organization has its own, its name, color and logo.
Two-step verification
Optional, for each account: after the password, signing in also asks for a 6-digit code that changes every 30 seconds, made by an app on the phone (Google Authenticator, Microsoft Authenticator, 1Password, Authy…). A stolen password alone does not get in.
- Account › Two-step verification › Turn on (or Turn on in the invitation at the top of the home, shown while it is off; Later hides it until the app is opened again).
- In the authenticator app choose Add and scan the QR code (or enter the key by hand).
- Type the code the app shows and press Verify and turn on.
- Keep the 10 recovery codes (e.g. in the password manager): each works once instead of the app's code, if you lose the phone. They are not shown again; new ones are made from the same page.
It applies to the app, the sign-in pages of private platforms and single sign-on (OIDC); for the same account in more organizations, turning it on once is enough. With it on, the e-mail sign-in link is not sent and, to join another organization, the invite code is entered in the app after signing in.
- Lost phone, no recovery codes: an admin of your organization (or the server owner, if the account is in more organizations) turns it off from Users and invites › user › Turn off two-step verification, after checking it is really you.
- To turn it off you need the password and a code.
- The code does not work? Check that the phone's time is automatic. After 5 wrong codes you must wait 15 minutes.
- No external service: the codes are computed by the server; the key is kept encrypted and the recovery codes only as a fingerprint.
Your data: export, backups, service status
Export data (administrators, ⋯ menu › Export data, where available): a zip file with people and roles, teams, platforms with their versions (and the zip of the live version, ready to publish elsewhere), cloud data, reports, signed contracts and the activity log. It contains no passwords, keys or secrets. On a computer the download starts by itself; on a phone you share a link to open in the browser, valid for 30 minutes. You can export once every 10 minutes and each export shows in the activity log. Partner agencies export each client's data from Clients › client › Export data.
Backups. Every night the database and files are copied on the server and, encrypted, to a second data center in the same region (EU or US): 30 daily and 12 monthly copies. Integrity is checked every week and a full restore test runs every month.
Service status. An external service checks every minute that App Drive is working and the status page shows it live; administrators get an e-mail about incidents and planned maintenance. Availability commitments, support response times and leaving the service are described in Continuity and SLA.
Security and privacy
- Two separate regions: a data center in the European Union or in the United States, chosen at sign-up; data stays in the chosen region.
- Encrypted connections; passwords are stored only in non-reversible form and cannot be read by anyone, Somio included.
- Organizations isolated from one another.
- Restricted platforms available to authorized users only.
- No advertising, profiling or tracking tools.
- A data processing agreement (GDPR Art. 28) is available for your company and its clients: request it at tickets@somio.it.
Details are in the privacy notice (in Italian).
FAQ
How do I invite someone outside the organization directly into a team? From the team select Add member › Add by e-mail: if the organization allows team admins to invite, App Drive generates a code that registers the person and adds them directly to the team. Otherwise an administrator invites them first from Users and invites, and they are then added to the team.
Must every user belong to an organization? Yes: every account belongs at least to the organization of its invite code. The same account can then join other organizations.
Do the agency's clients need a subscription? No: pricing is per agency, with unlimited clients. The agency pays for its own organization's subscription; client organizations activated on its behalf receive no payment notices.
Can I publish an application with a back end? App Drive hosts the front end (static site). The back end stays on Supabase, Firebase or a dedicated server; public keys are supplied through build variables.
If saving the data the application keeps in the browser is enough, cloud data is available.
What does someone opening the link of a restricted platform see? A sign-in page with the organization's brand. Only authorized users get in: whoever published it and the people and teams it is shared with.
An application on Vercel (or Lovable) was made restricted: why is the site's address still reachable? Because the site is not hosted by App Drive: login protects the App Drive link, not the direct address. For complete protection use Host on App Drive.
An application built with AI loses its data when the device changes. How is this solved? By enabling cloud data (Pro plan): with no changes to the application, data is stored on App Drive.
What happens to the data if payment stops? The organization is suspended with no deletion: once paid, everything becomes available again. To request full deletion of the data, write to tickets@somio.it.
Do platforms work offline? On smartphones yes, if the platform has been made available offline. Data the platform retrieves from its own server still requires a connection.
Support Write to tickets@somio.it.